
Kitchen sink plumbing refers to the system of pipes, drains, traps, and vents that carries water and waste from the kitchen sink to the main sewer line. It consists of the drain assembly under the sink leading to a P-trap, which connects to drain pipes in the wall or floor. These pipes join other household drain lines before exiting the home.
How Kitchen Sink Plumbing Works? This is a common question for homeowners trying to understand the hidden complexities behind their simple kitchen sink. While we don’t often think about it, the water that disappears down our drain has a long journey that relies on gravity, vents, and carefully sloped pipes to reach the main sewer line.
The basic components of kitchen sink plumbing start with the drain basket and tailpiece under the sink, connecting to the curved P-trap. This trap holds water to block sewer gases from the pipes. The drain pipes then connect to a vent, allowing air flow to prevent suction and siphonage problems.
Basic Components Of Kitchen Sink Drainage System
The basic components of a kitchen sink drainage system include the sink strainer, tailpiece, P-trap, drain pipes, and vent pipes. The strainer catches food debris, allowing water to flow down while keeping solids out of the pipes. The tailpiece connects the strainer to the P-trap.
The P-trap is the U-shaped pipe underneath the sink, designed to hold water and prevent sewer gases from entering the home. Vent pipes release gases from the system while allowing air in so water flows freely. Drain pipes carry wastewater downward and connect to the main sewer line.
Route Water Follows From Faucet Through Pipes
When the faucet is turned on, water travels from the hot and cold supply lines through the faucet spout and out into the sink basin. From there, water goes down the drain, entering the tailpiece attached to the sink strainer.
The water flows from the tailpiece into the P-trap, then travels horizontally into the main drain pipe in the wall. This pipe slopes downward, using gravity to direct water into the main sewer line underground outside the home.
Purpose And Design Of P-Shaped Pipe Under Sink
The P-shaped pipe underneath the kitchen sink is called a P-trap. It is designed in a “P” pattern to always hold water, thereby creating a water barrier that prevents sewer gases from traveling back up the drainage system into the home.
The bend in the pipe traps a small amount of water each time the sink drains. This sealed water barrier blocks gases and odors. The vent pipe releases gases from the system while allowing air in so water can flow freely.
Connecting Tailpiece To Main Drainage Piping
The tailpiece is the curved pipe attached to the bottom of the sink strainer. To connect it to the main drainage system, the tailpiece slides over or into a P-trap, with a washer or plumber’s putty creating a watertight seal.
The P-trap is then fitted into the drain arm pipe, which connects to the main drainage line inside the wall. The joint may use threaded fittings, a slip joint, Kitchen Sinks A Bad Idea or compression fittings sealed with pipe thread sealant or plumber’s putty.
Ensuring Proper Slope For Water Flow Downward
Drainage pipes must slope downward at a rate of 1/4 inch per foot to allow wastewater to flow using gravity. This prevents standing water inside pipes. Vent pipes also slope down to prevent moisture buildup before connecting to the main vent stack.
If pipes do not slope enough, drainage can slow and pipes may clog more easily. A plumber can test slopes using levels and make adjustments as needed to ensure proper functional drainage. Insufficient slope is often easiest to correct during initial installation.
Types Of Pipes And Joints Used In Plumbing
The drain, vent, and supply pipes in plumbing systems are commonly made of plastic, copper, or galvanized metal. Plastic pipes include PVC, CPVC, and ABS. Joints connect pipe ends, using threaded fittings, compression fittings, or solvent cement for plastic pipes.
Tailpieces attach with slip nuts and washers, while P-traps connect via slip joints or compression fittings. Threaded fittings are sealed with pipe joint compound or plumber’s putty. Drainage system pipes and vents may be glued, joined with couplings, or connected via T joints to merge flows.
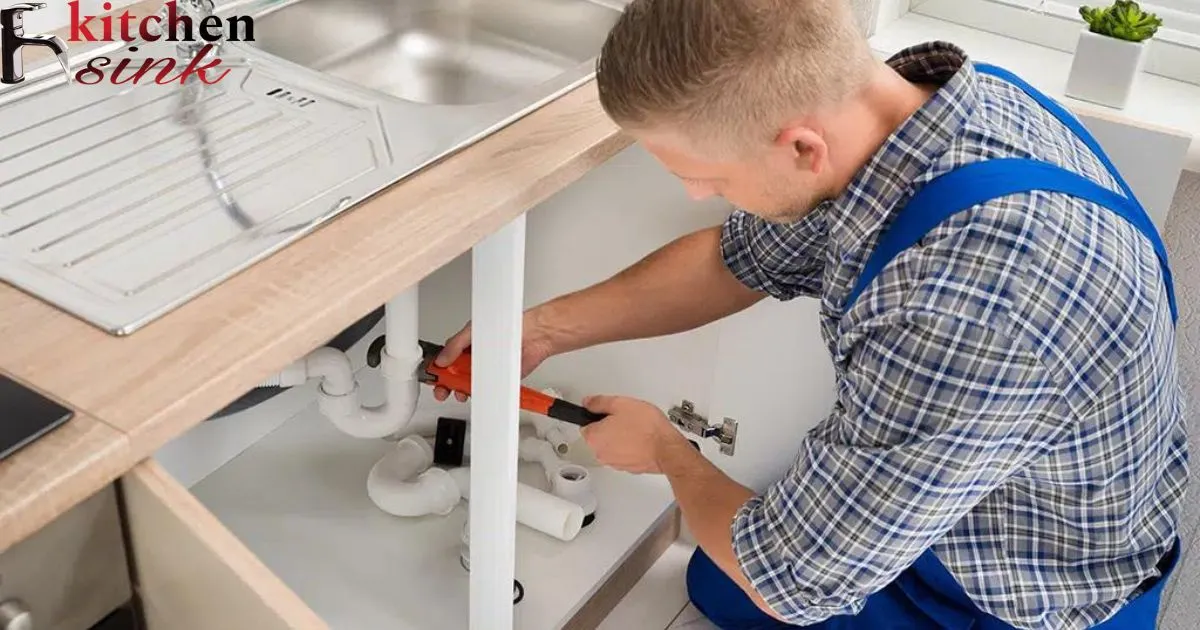
Installing Drain Basket And Tailpiece Assembly
A basket strainer drain assembly includes the strainer basket, strainer body, tailpiece, and mounting hardware. First, the sink is set into place. Plumber’s putty is applied around the strainer drain flange to seal it when tightened from below the sink.
The strainer body extends down through the sink hole. The tailpiece is slipped over the strainer outlet, with a washer providing a tight connection. The P-trap assembly is fitted to the tailpiece and tightened via slip nuts or threaded fittings.
Creating Watertight Seal With Plumber’s Putty
Plumber’s putty provides a watertight seal between drain components and sink surfaces. To apply putty, it is rolled into a rope shape and placed around the underside of the drain flange, which sits flush against the sink.
As the strainer is tightened from below with a mounting nut and washer, the putty is pressed into place, sealing gaps. The excess putty is trimmed away. The compression creates a tight, durable seal to prevent leaks between the sink and strainer.
Connecting Hot And Cold Supply Lines To Faucet
Flexible supply lines carry hot and cold water to the faucet. Compression fittings at the faucet end allow the lines to be hand-tightened. Washers or gaskets seal these compression joints.
The other supply line ends connect to the angle stops. These valve fittings on the water supply pipes are turned on once lines are connected, sending hot and cold water through the faucet. The angle stops allow water to be shut off later for faucet repairs.
Anatomy Of Faucet And Valve For Water Control
A faucet contains hot and cold inlet supply lines leading up to the single lever or dual handles that control flow volume and temperature. Inside is a cartridge or disk mechanism that moves to adjust the hot and cold water mix.
Water flows down through the spout. At the base of the spout is an aerator screen which mixes in air to prevent splashing. Some faucets have a pull-out spray head with an additional flow control valve. The sprayer hose threads through the spout to allow full range of motion.
Getting Proper Fit With Drain Pipes And Traps
A secure fit between sink drain pipes is crucial to prevent leaks and blockages. P-traps connect to tailpieces and drain arms via slip joints and compression sleeves or nuts.
Tightening these compression fittings firmly makes a watertight seal while allowing some adjustability if needed. The trap arm should align cleanly with no kinks or vertical sections, enabling proper wastewater flow into the main drainage pipes inside walls.
Avoiding Leaks Through Correct Pipe Sizing
Pipe sizing is crucial to avoid leaks and other issues. If pipes are undersized, flow rates and water pressure can be too high, causing leaks, corrosion, and potential bursting. Oversized pipes also risk problems like contamination and odor fade due to stagnant water from low usage.
Always calculate required pipe sizes carefully based on expected flow rates, pressure, pipe materials, and safety factors. Consider present and future usage to right-size pipes. Match pipe sizes across entire systems, using adapters if needed between pipe materials. Follow code requirements and recommendations.
Venting System Prevents Siphonage Problems
Proper venting helps drainage flow smoothly and prevents unhealthy and hazardous siphonage. Vents equalize air pressure to avoid suction holding water in pipes. This lets fixtures drain freely down to the main sewer line.
Vent piping from drain lines should terminate outdoors, above the roof. Vent vertically when possible, avoiding horizontal lengths. Size vents appropriately for drainage flow rates. Use a main vent stack with connections from fixtures. Install individual vents if main vent is unavailable. Follow vent installation codes.
Garbage Disposal Installation Tips And Tricks
Prepare electrical wiring with proper outlet under the sink before installing a garbage disposal unit. Mount the disposal using bolts and fittings included with the unit. Support weight at the mounting ring assembly. Connect drain piping in proper order: disposal, trap, drain. Spin to confirm free rotation.
Test for leaks at connections. Verify quiet, smooth operation by running water and flipping the disposal switch with various waste loads. Be sure to keep small or hard objects out of the disposal to prevent jamming and damage. Run cold water during and after use.
Dishwasher Hookup Process Step-By-Step
Installing a dishwasher involves both plumbing and electrical work. Shut off water supply and power under the sink before beginning. Connect hot water supply line to inlet valve. Install drain hose high in cabinet before attaching to the sink drain or garbage disposal. Secure drain hose to prevent sagging.
Provide proper electrical connection with wire nuts in the junction box. Run dishwasher briefly to check for leaks at fittings. Verify heating element works. Remove debris caught during installation by running a short cycle with vinegar. Install insulation and panels before reinstalling kickplate.
Importance Of Traps Preventing Sewer Gas Entry
Every plumbing fixture requires a drain trap between itself and the main sewer ventilation system. Traps hold water to block sewer gases from entering living spaces, while allowing waste water to pass through. If traps dry out from lack of use, dangerous hydrogen sulfide gas can escape.
Pour water into unused drains periodically to maintain the water seals. Immediately replace any leaking or cracked traps. Use deep-seal traps where possible for more water volume and increased evaporation time between uses. Follow manufacturer specifications and code requirements when installing traps.
Tools And Materials Needed For Diy Installs
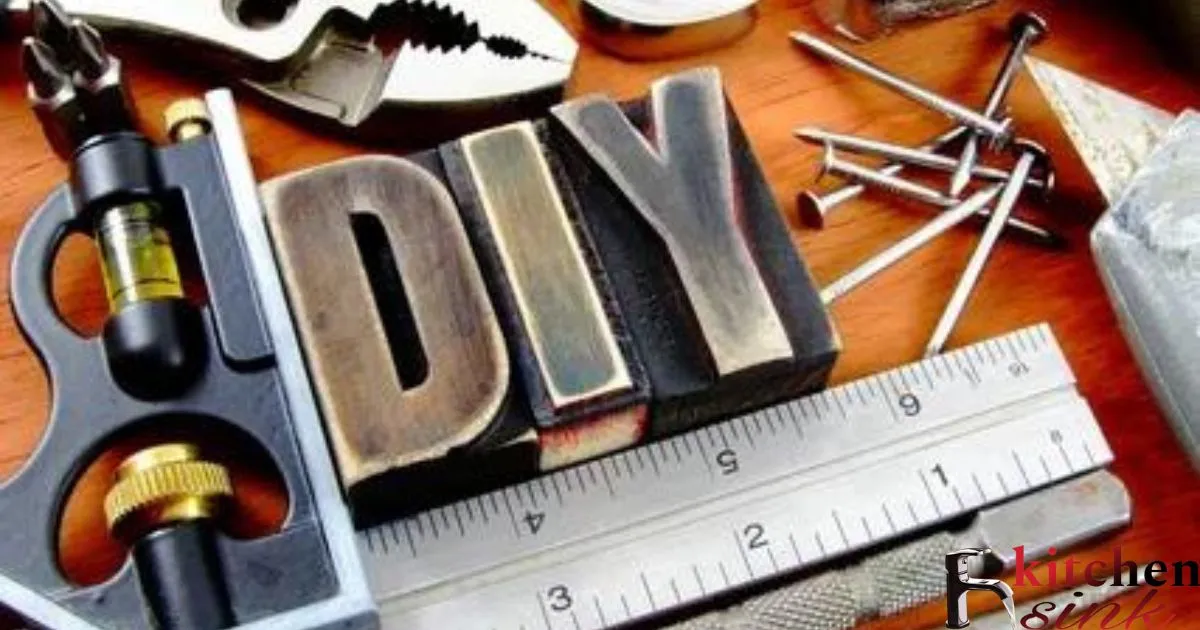
From basic repairs to new fixture and appliance installations, having the right DIY plumbing tools makes jobs much easier. Essentials include wrenches, cutters, levels, caulk guns, and pop-up trip lever tools. For sink hookups, supply tubes, fittings, shutoff valves, trap assemblies and tailpieces are crucial.
Always use quality materials that meet code requirements. Understand your skill level and project complexity to decide if professional help is advisable. Improper DIY work can lead to leaks, flooding, electrical issues and other costly problems down the road. Consider both safety and your households needs.
Step-By-Step Sink Cutout And Mounting
Measure carefully and use the sink template to trace cut lines on the countertop. Drill a starter hole before cutting with a jigsaw. Set sink in place to test alignment before final mounting. Apply silicone caulk generously along the rim to seal to countertop.
Use mounting brackets, tightening from below the sink. Connect drain assembly and p-trap, followed by water supply hookups with shutoff valves. Seal around edges with additional caulk if needed. Let caulk fully cure before use. Follow all manufacturer instructions for solid installation.
Helpful Plumbing Layout Maps And Diagrams
Quality plumbing plans and schematics are invaluable references during repairs or renovations. They show piping layouts, locations of supply lines, drains, sewer connections, valves, vents, and more. This helps pinpoint underlying issues and plan efficient repairs with minimal demolition.
Update all documentation after doing work or modifications. Digital photos also help record piping details and connections behind walls or under sinks for easy reference later. Keep one master set of all utility plans for emergency responders and insurance purposes in case disaster strikes.
Troubleshooting Common Drainage Issues
Slow or blocked drainage could indicate buildup, leaks, collapsed pipes, or other problems. Confirm sufficient slope along pipe runs for proper flow. Inspect accessible areas for cracks or disconnected joints. Listen for running water indicating leaks.
Use a plumber’s snake or drain auger to clear blockages. Try a plunger first on simple toilet or sink clogs. For recurring issues, have drain lines professionally inspected with a sewer camera to identify trouble spots for targeted repairs. Address all problems promptly to prevent serious backup or flooding.
Frequently Asked Question
Where Does The Water Go When It Goes Down The Drain?
The water travels from the tailpiece into the P-trap, then into drain pipes within the walls that slope downward into the main sewer line.
Why Is There A U-Shaped Pipe Under The Sink?
The U-shaped pipe is called a P-trap and it holds water to prevent sewer gases from entering the home while allowing waste water to drain.
What Is The Purpose Of The Vent Pipe?
Vent pipes release gases from the plumbing system while allowing air in so water can flow freely down the drain.
How Are Supply Lines Connected To Faucets?
Flexible supply lines with compression fittings carry hot and cold water to faucets. These lines connect to angle stops valves that can shut off water.
Why Do Drain Pipes Need To Slope Downward?
Sloping drain pipes use gravity to pull waste water downward through the system. Insufficient slope can slow drainage and clog pipes.
Conclusion
Kitchen sink plumbing consists of the water supply pipes, drains, traps, valves and fixtures that allow a kitchen sink to function properly. The system brings in fresh water and takes away wastewater, with components to control flow as needed.
Kitchen sink plumbing involves both supply and drainage lines working together. Understanding how the drain-waste-vent system removes water, how to prevent clogs, leaks and contamination, and being able to identify worn parts are all crucial for proper functionality and maintenance. Proper installation and repairs help ensure a safe, hygienic and operational sink for daily kitchen tasks.