
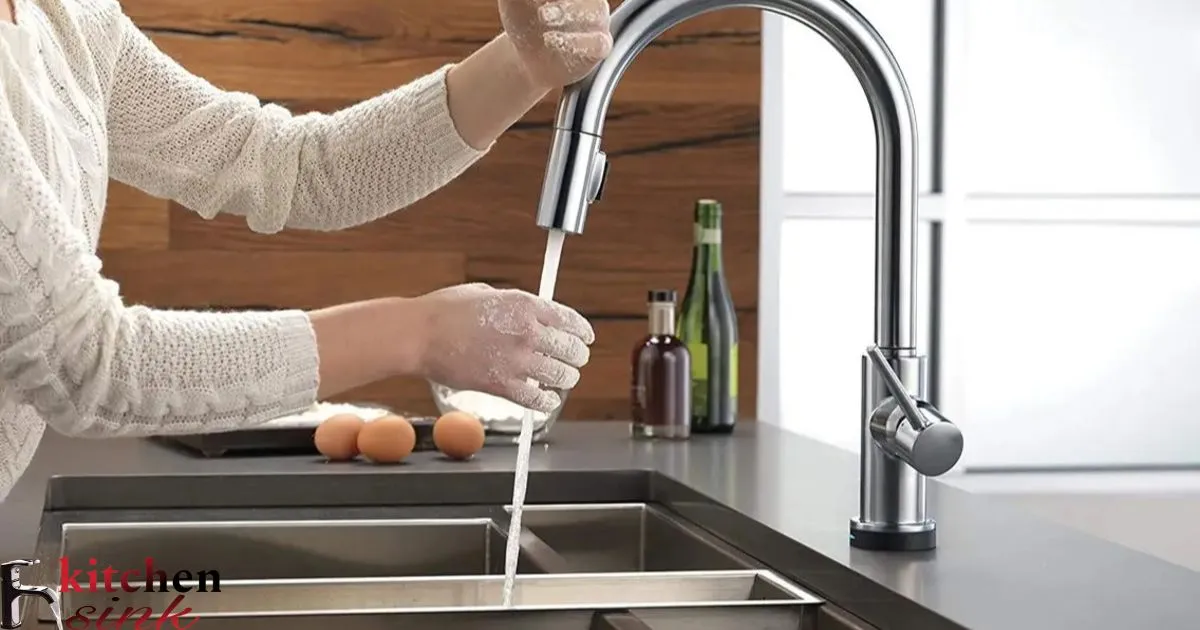
Water pressure in the kitchen sink refers to the force at which water flows from the faucet. It’s determined by factors like the plumbing system and water supply. Adequate pressure ensures efficient cleaning and rinsing in daily kitchen tasks.
Struggling with low water pressure in your kitchen sink? Don’t let it dampen your cooking experience any longer! Discover simple yet effective solutions to tackle this common household issue head-on. Let’s delve into practical steps to unleash the full flow of your kitchen faucet and regain control over your culinary domain.
To boost water pressure in your kitchen sink, start by checking the aerator for debris. Clean or replace it if necessary. Next, inspect the shut-off valves under the sink to ensure they’re fully open. If these steps don’t help, consider calling a plumber to assess and fix any underlying issues.
Some Common Causes Of Low Water Pressure In The Kitchen Sink
One common cause of low water pressure in the kitchen sink is mineral buildup in the faucet’s aerator. Over time, minerals in the water can clog the small screens in the aerator. This restricts the flow of water and reduces pressure. Another potential cause is a kink or clog in the supply lines bringing water to the faucet. Debris in the lines can slow water flow.
Low water pressure in the kitchen can also be due to increased water usage in other areas of the home. If more taps or appliances are running concurrently, it draws more water which affects pressure at individual fixtures like the sink. The hot water heater may not be able to keep up with higher demand if usage has increased substantially. This can cause low pressure issues, especially with hot water.
Mineral Buildup In The Faucet Aerator
One way to check for mineral buildup in the aerator is to remove it from the faucet spout and inspect it closely. Hold it up to the light and look through the small screens or passages. Over time, mineral deposits may be visible forming a crust on the screens or accumulated inside the aerator itself. This buildup can restrict flow even if it’s not immediately obvious just by looking at it.
You may also notice symptoms of reduced water pressure and flow at the faucet itself which indicate there could be an internal buildup issue with the aerator. Mineral deposits tend to develop very gradually over months or years of regular water use, so it’s easier to detect the problem if you frequently use that particular faucet and notice a change in performance.
Hot Water Heater Not Producing Enough Pressure
If the issue is only occurring with hot water flow from the faucet and cold water pressure is normal, Turn Off Water Under Kitchen Sink it points to a problem with the home’s hot water heater. One potential cause is that the water heater is too small for the household’s needs, especially if the number of occupants has increased. An undersized tank cannot keep up with demand.
It’s also possible the temperature and pressure relief valve on the water heater is faulty and continuously discharging water, or there are issues inside affecting water pressure produced. In either case, the heater may need to be professionally serviced, have components replaced, or be upgraded to a larger unit to restore adequate pressure for all home fixtures.
Kink Or Clog In The Supply Line
A kink or clog in the supply pipe can cause low pressure from a single faucet like the kitchen sink. Over time, mineral deposits may accumulate inside the copper or metal piping. There’s also a chance debris from the water source or old pipe joints could become dislodged and get stuck in the line.
Kinks are more common if the supply pipes are exposed and have been bent or dented accidentally. Clogs are harder to spot but can form in any pipe over several years of use. Both issues diminish the pipe diameter and restrict water flow, resulting in noticeably decreased pressure at fixtures downstream. Professionals have methods to inspect the lines and clear any blockages.
Water Usage Increased In The Home
Changes in water usage patterns throughout the house can influence pressure levels at individual fixtures like the kitchen sink. For example, if a second bathroom was recently added with more fixtures or appliances updated, it places higher demand on the entire home’s water and plumbing system.
At the same time, leaks from old or poorly installed fixtures also effectively increase usage even if the number of water sources remains the same. Both situations mean there’s less overall pressure and flow available at any single tap. Checking for and fixing leaks can help, as may improving or updating the home’s plumbing and water heating systems if usage changes require it.
Check For Mineral Buildup In The Kitchen Sink Faucet
One way to check for mineral buildup is to remove the aerator from the faucet spout. Most can unscrew counterclockwise by hand with an adjustable wrench or pliers. Hold it up to the light and look closely through the small screens or openings inside. Over time minerals like limescale can form a crust on the screens or accumulate inside the aerator, restricting flow.
Another indicator is reduced water pressure and flow rate noticeable over months of regular use. Mineral deposits form very gradually so frequent users are more likely to detect any changes in faucet performance indicating an internal buildup issue. Thoroughly washing the aerator screens under running water can help dislodge loose deposits and determine if cleaning improves flow.
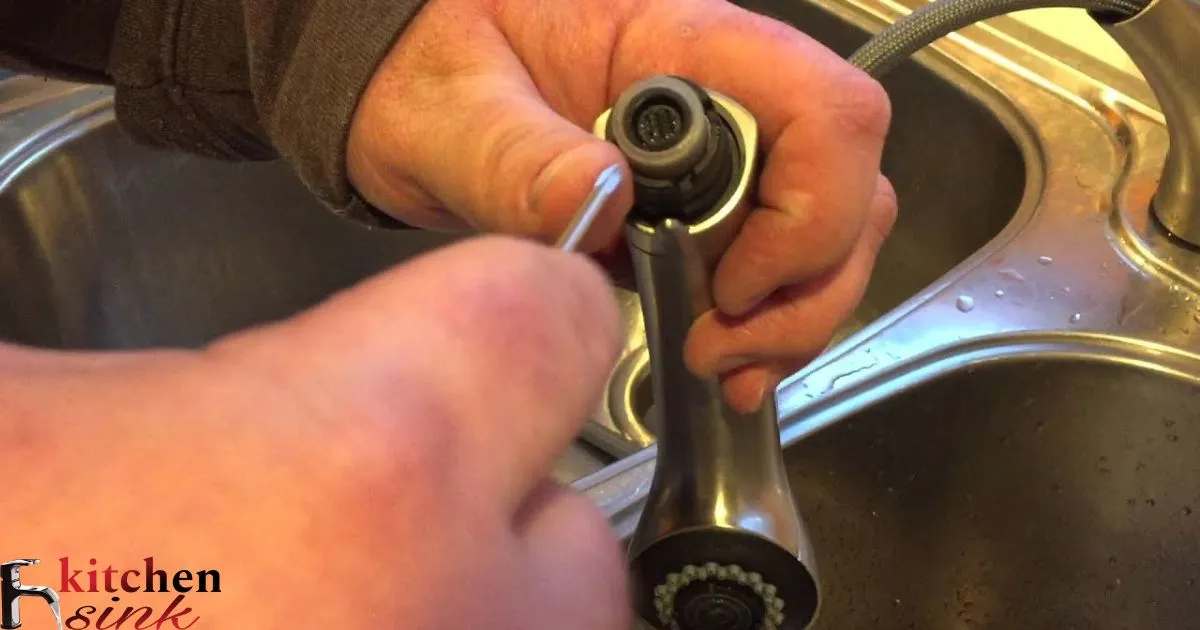
Faucet Aerator And How Do I Remove It
A faucet aerator is a small plastic or metal attachment at the end of the faucet spout that mixes water with air for improved flow and splash reduction. It contains precision-cut screens or passages to achieve this. Removing it gives access for inspection and cleaning of mineral deposits that can accumulate internally.
Most aerator attachments unscrew counterclockwise very easily by hand. An adjustable wrench or pliers may help provide leverage, but take care not to scratch or damage the faucet finish. Once off, check the screens by holding it up to the light. Make note of any crusty or accumulated residues inside that could be restricting flow before cleaning in white vinegar or limescale remover.
Mineral Buildup Look Like
Mineral buildup from hard water typically appears as a white, chalky crust or residue. Over many years of use, it can accumulate layer by layer on the aerator screens until spots or craters gradually fill in. Early signs are faint white flecks visible upon close inspection.
As deposits progress, they form a pale sandy or pebbly texture encrusting the internal surfaces and narrow openings. Eventually mineral crust may almost fully block passages through severe scaling. The buildup process happens very slowly, so it’s easier to detect changes in faucet performance (flow/pressure issues) rather than see deposits with the naked eye initially. Regular cleaning helps prevent significant blockages.
Clean The Aerator To Remove Mineral Deposits
To clean the kitchen faucet aerator, start by removing it from the spout. Soak it in white vinegar for 30 minutes to an hour to dissolve mineral scale. This works by reacting with calcium and limescale to form calcium acetate which dissolves in the vinegar solution. agitate it occasionally for best results.
Alternatively, use a limescale remover specifically made for faucet aerators. Scrub stubborn deposits with an old toothbrush. Then rinse thoroughly under running water and wipe dry. Check that water flows freely through the screens before replacing. Repeat soaks if any residue remains to fully restore flow. With regular cleaning, mineral buildup won’t affect pressure over time.
Cleaning The Aerator Improve Water Pressure
Yes, properly cleaning a mineral-encrusted aerator is very effective for improving water pressure from the kitchen faucet. Internal deposits gradually restrict the narrow openings and screens over months/years of regular use. This diminishes flow rate and exerted pressure at the faucet.
By soaking and scrubbing the aerator to dissolve built-up scale, the microscopic passages re-open to their original size. With freer flow achieved through the cleaned screens and body, water can once again be discharged from the faucet spout using its full inherent pressure from municipal supply pipes and hot water tanks. Most notice an immediate upgrade after clearing clogs this way.
With regular preventive cleaning of the aerator component, pressure levels at the sink can be maintained longer term without drop-offs commonly caused by unaddressed mineral accumulation. It’s a simple maintenance task to restoring full performance from the faucet as designed.
Hot Water Heater Is The Culprit
If the low pressure issue is isolated to hot water supply, there may be a problem with the home’s water heater. The first step is inspecting it for potential faults or signs of damage. This includes checking temperature-pressure relief valve function and looking for corrosion. Documentation of the heater’s age is also important as units over 10 years may need replacement. Professional evaluation can determine appropriate repairs or upgrades needed.
If issues are found, calling a plumber is advisable for safely diagnosing and fixing heater problems before extensive damage or accidents occur. They have the know-how and tools to properly service the unit according to code. In some cases, replacing an older heater with a larger more efficient model may solve pressure inadequacies due to higher household usage demands.
Hot Water Heater Is Old Or Damaged
The age of the water heater is a clue to whether replacement might be needed. Units typically last 10-15 years with regular maintenance but can fail prematurely if damaged. Examine it for signs like rust around pressure/temperature valves or tank seams which indicate corrosion problems on the inside.
Improper working of the temperature and pressure relief valve popping noisily is also a warning. Consult documentation for the heater’s installation date if not labeled. Plumbers can further assess internal tank conditions and estimate its remaining safe lifespan. Addressing an aging damaged unit prevents costly repairs from delayed maintenance down the line.
Any Warning Signs From The Hot Water Heater
Gradual changes in hot water availability can indicate issues developing in the water heater like decreasing pressure or temperature fluctuations. These include noticeably lower water flow from sinks and showers compared to the past.
Other potential warning signs are unusual noises coming from the unit, establishment of sediment or rust coloring at fixture discharge points, a spike in utility bills possibly from tank leaks, as well as strange smells emitting from the heater area. Addressing problems early helps prevent further damage and expensive repairs or replacement needs.
Some Common Hot Water Heater Issues
Some typical hot water heater problems include failures of the temperature and pressure relief valve, cracks or leaks in the storage tank, low pilot light flame or faulty thermocouple, scaling buildup reducing heat transfer efficiency, and corrosion of internal metal components. Aging parts like flammable material insulation and heating elements also regularly need replacement.
Sediment layers inside the tank can alter heating function and lower available hot water over time. Professional cleaning helps restore performance but is no substitute for a near obsolete unit. Identifying specific issues enables proper troubleshooting and repairs before complete heating system failure occurs.
Check The Pressure Relief Valve On The Water Heater
To check the relief valve, begin by turning off the cold water supply line and opening a nearby hot water faucet to depressurize the heater. Examine the valve stem carefully and lift gently using the handle provided as a test.
The valve should pop up with minimal resistance if working correctly. If not, continuous lifting may be required or it could be stuck closed. Make note of any leakage, corrosion or debris present as signs of malfunction. Relief valves need annual testing for safety and may need replacement every 5-10 years depending on water conditions.
Check The Supply Lines For Kinks Or Clogs
To inspect supply piping, first locate the main water shut-off valve and turn it clockwise to the off position. Open faucets downstream to release pressure. Then check accessible sections of copper or metal piping serving fixtures for kinks, dents or signs of damage and leaks.
Insert a wire coat hanger or specifically designed pipe snake tool gently into pipe openings to see if it moves freely the full run or meets resistance that could indicate a clog. Twisting or bind points when moving the tool suggest pipe damage affecting water flow. Professionals have more advanced scope inspection techniques as well.
Water Supply Lines And Where Are They Located
The water supply lines are the pipes that carry both hot and cold water from the main service entrance and water heating systems to individual fixtures throughout the home. They’re often copper but can also be plastic.
The cold water line comes into the house from the utility meter and branches to deliver water. The hot water line runs from the storage water heater tank. Both are located within walls beneath floors or in accessible attics, crawlspaces or basements to their end points like sinks, toilets and showers.
Tools Do I Need To Inspect The Supply Lines
5 basic tools needed to inspect water supply lines in short sentences
- Flashlight – An LED flashlight allows you to see inside pipes and locations that are dark.
- Wire coat hanger – Straightening a wire coat hanger creates a probe to push into pipes to check for blockages.
- Adjustable wrench – An adjustable wrench is used to turn water shut-off valves on and off when isolating supply lines.
- Plumbing snake – A bendable plastic or wire snake tool helps clear debris or check continuity from entry to exit points.
- Gloves – Wearing gloves protects hands from potential sharp edges or chemicals when working on old supply pipes.
Kink Or Clog In The Supply Line Look Like
A kink appears as a sharp bend in the pipe causing crimping. It may be obvious visually if located externally or found by hitting a resistance spot while passing a coat hanger through internally. Clogs aren’t as readily seen and feel like an area that completely stops passage of the inspection tool.
Corroded crevices or buildup material inside old pipes can cause a clog. Kinks may result from accidental impacts distorting a flexible copper tube over time. Both issues close off the pipe cross-section, restricting water flow and available pressure for fixtures.
Fix A Kinked Or Clogged Supply Line
| Steps | Details |
| Locate the issue | Inspect supply lines for kinks, bulges or tight bends that restrict flow. |
| Isolate water flow | Shut off water at the main valve and release pressure by opening faucets. |
| Examine the problem area | Use a flashlight to closely look for the exact location of the kink or clog. |
| Use inspection tools | Test sections with a wire or specially designed snake tool to find blockages. |
| Consider replacement | Severe kinks may require cutting out and replacing part of the affected line. |
| Clear minor clogs | Try pushing or flushing out loose debris from lightly clogged sections. |
| Professional assistance | Contact a plumber for major clogs or clogged sections needing specialized tools or equipment. |
| Reconnect water supply | Turn the main valve back on once repairs are complete to restore normal flow. |
| Test for successful fix | Check all fixtures for normal pressure to confirm the issue is resolved. |
Else Can I Do If Pressure Remains Low
A few other potential remedies if low pressure persists after checking the obvious causes include updating old galvanized steel piping prone to internal rust clogs, checking outdoor sprinkler valves are closed to reduce usage demand, and inspecting the home’s main water meter for malfunctions cutting supply flow volume.
It’s also possible flow problems originate upstream at the municipal utility end requiring their assistance to diagnose at the main connection. Advanced plumbing issues may necessitate calling in an expert for a full home system evaluation and recommendation of long-term improvement solutions.
Should I Check If There Are Any Leaks In Pipes Around The Home
Checking for water leaks both indoors and out can reveal if excess usage could be lowering pressure. Look in areas under sinks and near water-using appliances for moisture trails or damp spots indicating tiny flow losses over a prolonged period.
Outside, inspect the ground near meter boxes and exposed pipe sections for damp patches. Leaks loose even small daily volumes unnecessarily and require repair before pressure can recover to normal levels. Fixing faults efficiently saves water and utility costs too over the long run.
Issue With The Main Water Supply Line
If checking internal plumbing turns up nothing, it’s possible the problem lies with the external main supply feeding the house from the street. Contact the local water utility to report any signs of disruption at the curb or property entry.
They can check for issues like partial clogs in the utility-owned portion of piping often buried underground. Detecting faults early lets them address root causes beyond the homeowner’s control directly affecting water delivery performance to all indoor fixtures and systems.
Plumber For Low Water Pressure Problems
Plumbing experts should be contacted when tried fixes fail to resolve loss of pressure or new symptoms appear. They can thoroughly troubleshoot utility connections, pressure tanks, supply networks including scope camera inspections, and properly test associated water heating and circulation gear.
Major leaks, damaged pipes unable to self-repair, and serious gas or electric water heater malfunctions also warrant calling in a licensed technician. Older multi-unit buildings may require coordinated efforts. Professional help ensures code compliance and safety for long-lasting repairs backed by their warranty.
Any Plumbing System Upgrades That Could Help
For some homes, updating aged pipes, meters or distribution lines may substantially boost pressure sustainability long-term. Larger diameter pipes carry more volume with less friction loss. Switching to PEX or copper from corroding galvanized steel also improves flow capabilities.
Adjusting the water softener’s regeneration schedule can prevent limescale buildup issues. Increasing the hot water heater’s tank size or installing an on-demand unit ensures adequate hot pressure even during high usage periods. System tune-ups proactively address root causes versus repeated quick fixes.
Plumber For Low Water Pressure Problems
Plumbing issues beyond minor maintenance like multiple, persistent pressure drops; significant water volume reduction; new unusual noises/leaks from systems; faulty main cut-off valves; or gas/water contamination concerns all warrant calling a professional. They have expertise identifying the root problem’s scope and safety handling hazardous repairs
Frequently Asked Question
Why Is Only My Kitchen Sink Water Pressure Low?
The kitchen sink water pressure might be low due to a clogged aerator or a problem with the faucet’s valve. Regular cleaning and maintenance can help restore proper water flow.
How Do I Increase Water Pressure In My Kitchen Tap?
To increase water pressure in your kitchen tap, check for clogs in the aerator and pipes, and consider installing a high-pressure regulator if necessary.
How Do You Fix Low Water Pressure?
To fix low water pressure, check for clogged pipes or faucets and ensure the main valve is fully open. If issues persist, consult a plumber for further assessment.
Why Is My Kitchen Hot Tap Running Slow?
The kitchen hot tap might be running slow due to mineral deposits clogging the faucet or a faulty valve restricting water flow.
Conclusion
Fixing low water pressure in the kitchen sink is manageable with a few simple steps. Firstly, check for any clogs or blockages in the faucet aerator and clean it thoroughly. Secondly, inspect the water supply valves to ensure they are fully open and functioning correctly. Additionally, consider checking for leaks in the pipes that might be causing pressure drops. By following these steps, you can restore adequate water pressure to your kitchen sink and ensure smooth functioning for everyday tasks.
If the issue persists, it might be beneficial to consult a professional plumber to assess any underlying problems with the plumbing system. They can provide expert advice and solutions tailored to your specific situation. Remember, addressing low water pressure in the kitchen sink promptly can prevent further inconvenience and ensure a seamless flow of water for cooking, cleaning, and other essential tasks in the kitchen.