
Water pressure in a kitchen sink refers to the force with which water flows from the faucet or tap. It’s important for tasks like dishwashing and cooking, ensuring efficient water usage and adequate cleaning power.
Is your kitchen sink water pressure causing frustration? Discover simple steps to fix water pressure in your kitchen sink effortlessly. Say goodbye to weak flows and hello to efficient water usage with our easy-to-follow guide on how to fix water pressure in your kitchen sink. Take action today and enjoy a smoothly running kitchen sink again!
Learn practical solutions to restore optimal water flow in your kitchen sink. Explore easy troubleshooting steps to address issues with water pressure efficiently. Regain control over your kitchen chores with these straightforward fixes.
Improving Water Pressure For The Kitchen Sink
Having good water pressure in the kitchen sink makes daily tasks easier. Whether you need to fill pots and pans or simply wash your hands, strong steady flow is important. The first step is identifying any potential issues restricting water flow. Common culprits include mineral buildup, leaks, or problems with valves or lines. With some basic checks and minor fixes, you can likely improve pressure.
Luckily, fixing low pressure is usually not difficult or expensive. More often than not, simply cleaning out mineral deposits from the aerator is enough. However, it also pays to inspect other components for issues. Completing a full review means you’ll pinpoint the problem quickly.
Causing Low Pressure In The Kitchen Sink Faucet
One typical culprit is a buildup of scale or mineral deposits inside the faucet aerator. Over time, hard water can clog up these small screens. Check to see if the aerator is stuffed with debris. Kinks or leaks in the supply tubing beneath the sink may also restrict flow. Have a look for any damage to these flexible supply lines.
It’s also worth inspecting the valves and potential problem areas like joints. Make sure shut-off valves fully open and close properly. Examine connections for potential leaks. Issue could stem from a larger problem like a clog in branch lines or even a pump failure. Start with the simple solutions before worrying about more complex plumbing issues.
Mineral Buildup In The Aerator
Mineral deposits frequently cause low water pressure problems over time. Calcium, limescale and other compounds accumulate in the aerator screen. This acts as a barrier to proper water flow. If the aerator appears clouded or plugged with debris, Tighten Kitchen Faucet Nut Under Sink this is likely the issue. Cleaning out mineral buildup is often a quick fix for restoring pressure.
You’ll want to inspect the aerator thoroughly for any buildup. Remove and soak it in vinegar to help dissolve mineral deposits. After soaking, flush it out under running water. Examine closely to ensure all debris releases from the small filter holes. A fully unclogged aerator typically remedies low pressure issues.
Could It Be Kinks In The Supply Lines
Flexible supply tubes feed water from the main pipes up to the faucet. But these can kink or bend over time, restricting flow. Carefully check the tubing for any damage like sharp kinks, cracks or flattening. Gently bend the lines to find any problem spots.
Pay close attention near connections as damage occurs most frequently here. Overall deterioration is another sign it’s time to replace old supply lines. New tubing ensures full water capacity with no limitations. Simple visual checks can uncover kinks as a possible reason pressure dropped off.
Flow Restrictor Clogged
Many kitchen faucets include an integrated flow restrictor to reduce water usage. But like aerators, these small filters can become blocked by mineral buildup or debris over many years. Remove and check the restrictor for accumulated gunk.
Soak it clean with white vinegar or replace if necessary. Confirming it moves freely ensures proper water flow. A clogged restrictor quietly limits pressure without noticeable symptoms until cleaned. Be sure to flush both aerator and restrictor when diagnosing pressure issues.
Issue With The Valves
Water flow control valves can malfunction in a way that impacts pressure. Check that supply line shut-off valves fully open and close as intended. If they remain slightly open, it restricts water volume.
Inspect the valves for signs of wear, damage, or mineral deposits around the valve stem. Apply valve grease as a lubricant if needed. Make sure swing-type valves seal properly when rotated closed. Repair or replacement fixes faulty valves allowing full water capacity.
Easy Ways To Fix Low Pressure For The Kitchen Sink
Restoring water pressure takes little effort with basic tools and supplies. The first step involves removing mineral deposits or debris from the faucet components. White vinegar does a great job dissolving scale buildup in aerators or restrictors.
Be thorough checking for other simple issues too such as kinked supply lines, faulty valves, or leaks. Replacing any damaged parts improves flow. Keep fixtures maintained to avoid problems down the road. With some TLC, your kitchen sink water pressure will be back in full force.
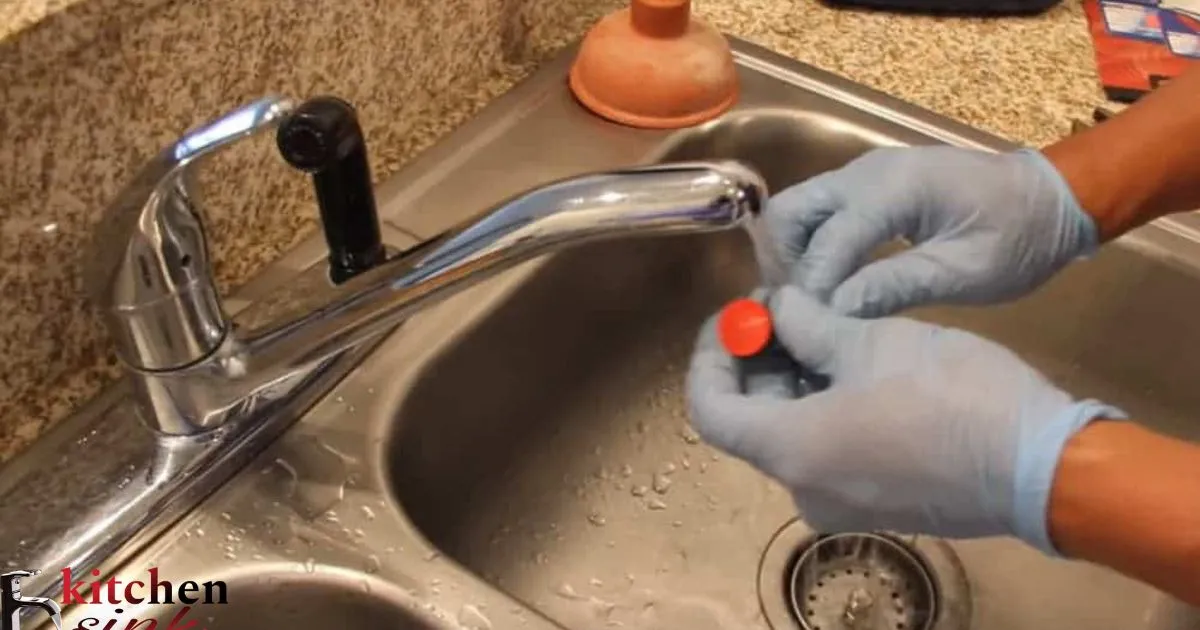
Clean The Aerator On My Kitchen Sink Faucet
5 easy steps to clean the aerator on your kitchen sink faucet
- Unscrew the aerator cap from the end of the faucet with an adjustable wrench or pliers.
- Place the aerator and screen into a small glass and fill with white vinegar.
- Allow it to soak for 30 minutes to dissolve mineral deposits and debris.
- Use a toothbrush or bottlebrush to gently swirl and scrub if needed. Rinse well with water.
- Check that the screen is fully clear before replacing the aerator by hand tightening it back onto the faucet.
Tools Will I Need To Remove The Aerator
To remove and clean the aerator, you’ll need a few basic tools. Most aerators feature a threaded collar that needs counterclockwise tightening. An adjustable wrench or pliers works well for grasping the collar.
You may also want a small screwdriver or bottlebrush for flushings parts. White vinegar does the trick for soaking away mineral deposits. Be sure to wear eye protection in case of splashing. Gather your tools before starting to minimize back-and-forth. Proper preparation makes the process quick and easy.
Best Way To Remove Mineral Deposits
While vinegar does a great job soaking away mineral buildup, certain types of deposits may require scrubbing. White vinegar is acidic enough to dissolve calcium, limescale and rust. Submerge the aerator and screen into a glass of straight white vinegar.
Let it sit for 30 minutes, checking periodically if deposits are flaking off. If needed, use a small bottlebrush or toothbrush to gently swirl and scrub the screen area. Don’t forcefully scrub as you could damage fine mesh material. Rinsing with water afterwards reveals any remaining debris. Repeat soaking if needed to fully clear mineral deposits.
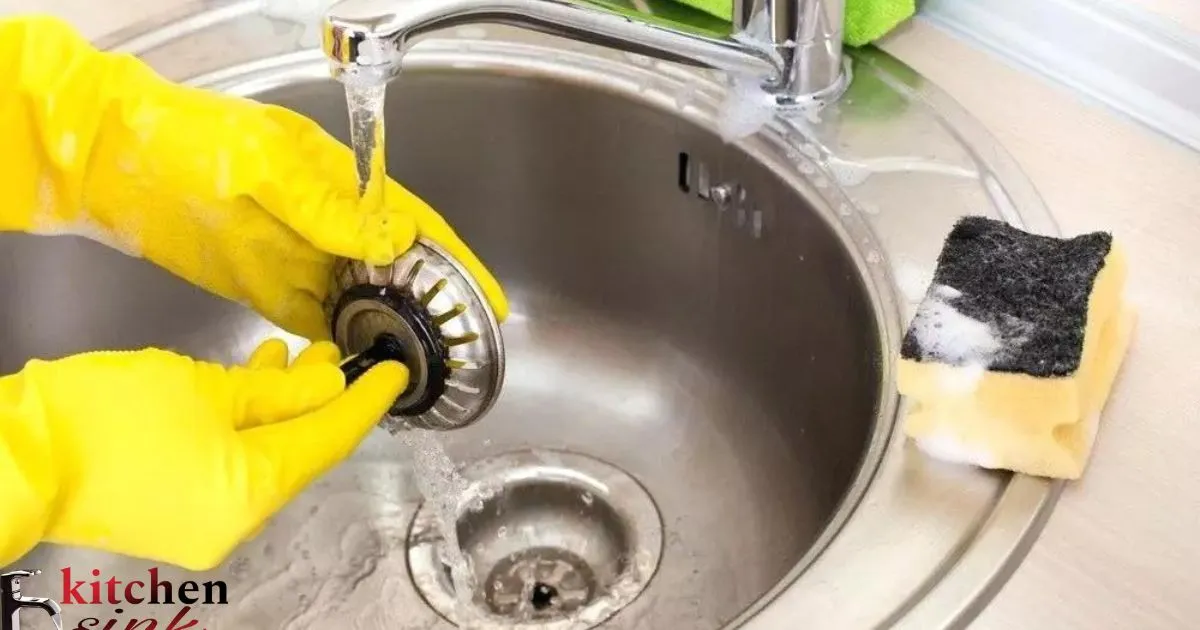
Put The Aerator Back On
Replacing the cleaned aerator is simple. Hold it under running water and check the screen is entirely clear. Then thread the aerator housing back onto the faucet in a clockwise direction.
Finger tighten is usually enough, though an adjustable wrench could ensure a good seal. Take care not to overtighten and potentially damage the collar threads. Running water tests that your kitchen sink pressure is restored. Be sure to also dry off surrounding area after reinstalling the aerator. With any luck, you solved the low flow issue!
Other Simple Checks For The Kitchen Sink’s Water Pressure
Besides cleaning the faucet components, taking a closer look at supply lines can reveal additional problems restricting flow. Give pipes a quick visual inspection for potential issues before starting any repairs. Addressing small problems now helps avoid bigger plumbing challenges later.
Any Leaks Or Kinks In The Supply Lines Below The Kitchen Sink
| Checkpoints | What to Look For |
| Connection points | Look for obvious dripping or moisture that indicates leaks |
| Supply line condition | Gently bend the lines and check for any flattened or stiff sections that show kinks |
| Where to inspect | Pay close attention to the lines near shut-off valves and fittings where damage is more likely |
| Inspect fully | Check the entire length of the copper tubing for dents, corrosion or other signs of impairment |
| Take action | Minor kinks may straighten but damaged sections need replacement to fix leaks and restore full water flow |
Look For In The Supply Lines
Pay attention to the lines and fittings connected to the shut-off valves. Verify tight connections without leaks or mineral deposits. Inspect the piping for any damage like dents, kinks or corrosion that impair water movement. Even minor flaws left unfixed can gradually worsen pressure issues.
Check For Kinks In The Tubing
Bend the copper tubing slowly while watching for any stiffness. Kinks likely occur near connectors which get the most handling. Another sign is a visible flat spot hampering the pipe’s round shape. Gently squeeze suspect areas feelings for obstructions in the line.
Find Issues With The Lines
Minor kinks may realign on their own after a few careful bends. Deeper kinks or leaks require replacing damaged pipe sections, usually inexpensive at hardware stores. Don’t over tighten tubing connections which could also restrict water flow. Properly fitted supply lines maximize kitchen sink pressure.
Additional Causes Of Poor Water Pressure At The Kitchen Sink
Sometimes low flow stems from larger plumbing problems elsewhere. Debris in branch lines, shut-off valve malfunctions or pump issues can indirectly weaken pressure. It’s worth investigating these less common potential culprits if all other fixes fail. Catching larger problems early prevents expensive repairs down the road.
Could It Be A Larger Issue With The Home’s Plumbing System
Larger scales of mineral deposits, main line breaks or well pump problems decrease water pressure overall. If individual fixture cleaning does little, check the home’s main shut-off, pressure tank and primary plumbing infrastructure for potential defects reducing flow everywhere.
Check The Water Pressure Tank
A malfunctioning pressure tankallows water pressure to dissipate over time rather than remain constant. Symptoms include increasingly weak flow and the need to run taps to restore pressure. Tanks usually last 10-15 years and can fail gradually. Check the pressure gauge and plunger movement.
Else Could Affect Water Pressure Throughout The Home
Issues beyond internal plumbing like main line breaks or volume reductions from the municipal system can lower pressure to all fixtures. Contact your local water department if noticing changes affecting the whole house. Sometimes external issues are unexpectedly to blame for perceptive indoor fixture problems.
Time To Call A Professional Plumber
Major issues involving the home’s water supply lines running to and from the street connection or pressure tank generally require an expert. Significant volume loss, flooding, strange noises or the inability to pinpoint the problem indicate it’s time to consult a licensed plumber for evaluation and repairs.
Restoring Full Water Pressure To The Kitchen Sink Faucet
With any luck, following some basic troubleshooting and quick fixes returns your kitchen sink water pressure to full strength. But confirm the job is fully done by double checking for any lingering issues before considering the problem fully resolved.
Signs That Identify The Problem Is Fixed
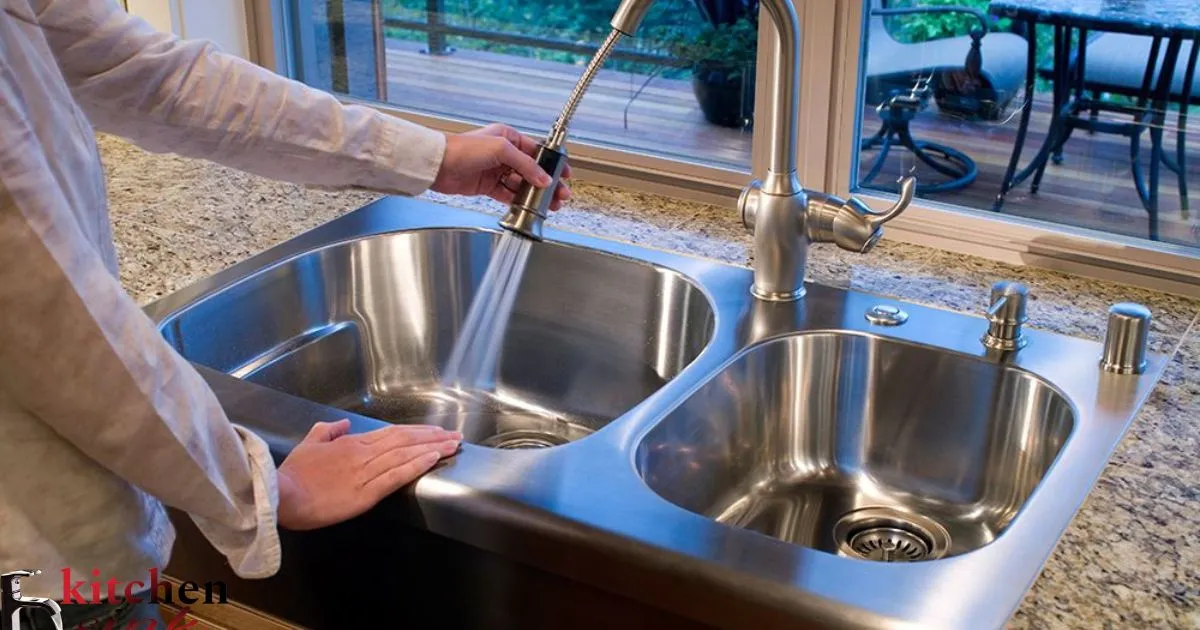
Strong, steady flow should occur the second you turn on the faucet handles without a warmup period. The stream should feel powered with good force behind it. No longer should you find yourself having to turn the handle to its maximum open position just to fill a pot.
Cleaning The Aerator Worked
Run water and check it moves smoothly through the aerator screen without pressure loss. There should be no pinched or weak spots in flow. With the aerator fully cleared, you’ll see and feel an immediate improvement to stream power as mineral deposits were likely the chief issue.
Confirm Good Water Flow And Pressure
Try filling containers of different sizes, from cups to pots, and feel how quickly it happens under ideal flow. Check for steady power rather than a weak dribble. Listen that the stream is loud and consistent without wavering. Noticeably stronger water indicates your fix was successful at restoring proper pressure.
Water Pressure Feel Like
With all potential problem areas addressed, the water should exit the faucet with energy and heft behind it. You shouldn’t need to apply much force on handles to get the job done. A smooth steady flow with some ‘‘oomph’’ demonstrates fully functional pressure delivery to your kitchen sink once again.
Frequently Asked Question
How Do I Increase Water Pressure In My Kitchen Sink?
To increase water pressure in your kitchen sink, try cleaning the aerator or checking for any obstructions in the pipes. If the issue persists, consider consulting a plumber for further assistance.
Why Is There No Pressure In My Kitchen Sink Tap?
The absence of pressure in your kitchen sink tap could be due to a clogged aerator or a malfunctioning water supply valve. Check these components to restore water pressure.
How Do I Restore My Water Pressure?
To restore water pressure, check for clogged pipes or faucets and ensure the main valve is fully open. Consider contacting a plumber if issues persist.
How Do I Increase Water Pressure In My Tap?
To increase water pressure in your tap, check for any obstructions in the pipes and ensure the valves are fully open. Consider installing a water pressure booster pump if necessary.
Conclusion
Fixing water pressure in a kitchen sink is crucial for smooth daily tasks. By following simple steps like checking for clogs in the aerator, cleaning the faucet head, and inspecting the supply valves, you can often resolve the issue. Regular maintenance and occasional adjustments can ensure consistent water flow and efficiency in your kitchen.
Remember, understanding the root cause of low water pressure is key to effective solutions. Whether it’s sediment buildup or issues with plumbing fixtures, addressing these issues promptly can restore proper water pressure, making kitchen chores easier and more efficient. With a little troubleshooting and maintenance, you can enjoy optimal water pressure in your kitchen sink once again.