
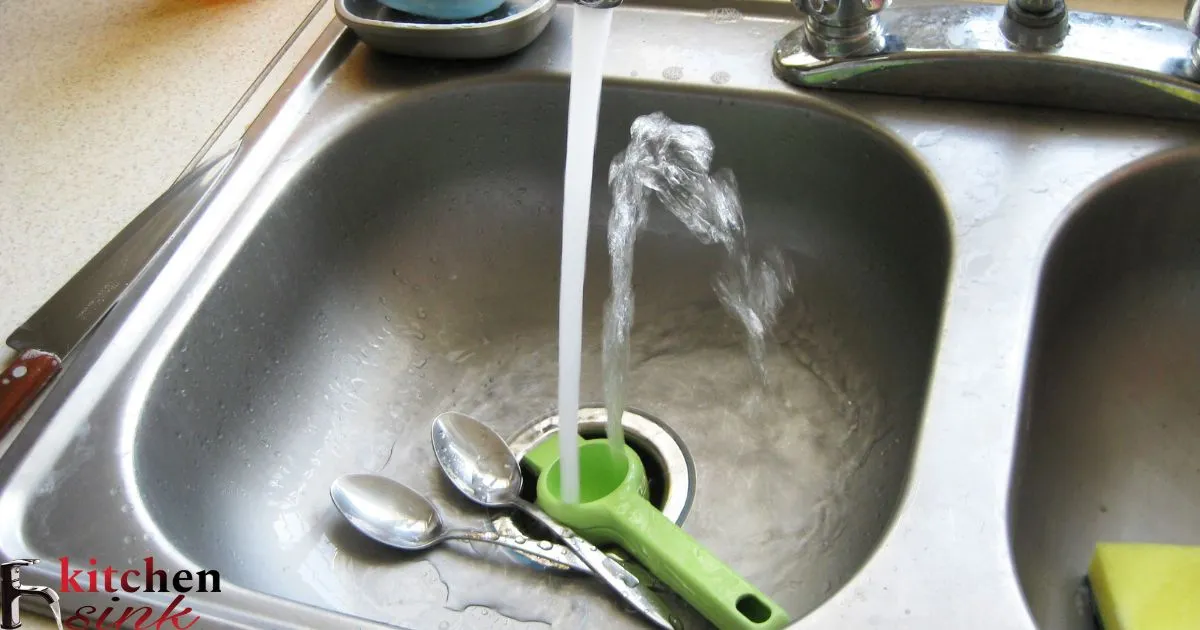
Water pressure kitchen sink refers to the force at which water flows through the faucet into the sink basin. It determines how efficiently water can be used for various tasks like washing dishes or filling pots.
Are you tired of waiting ages for your kitchen sink to fill up? Discover the simple solution to boost your water pressure! Learn how to increase water pressure in your kitchen sink effortlessly, ensuring faster and more efficient tasks like dishwashing and cooking prep. Say goodbye to sluggish streams and hello to a powerful flow with these easy-to-follow tips.
Improving water pressure in your kitchen sink can be achieved through several simple methods. You can start by checking for any clogs in the faucet or pipes, adjusting the pressure regulator valve, or installing a water pressure booster pump. Regular maintenance and troubleshooting can help ensure a steady and strong flow of water for your kitchen needs.
Troubleshooting Your Kitchen Sink’s Water Pressure
Low water pressure can be frustrating in the kitchen. The first step is figuring out the cause so you can fix the problem. You need good water flow to efficiently wash dishes and rinse. There are several issues that may be reducing pressure to your sink. Check each part of the supply line for problems.
Common causes of low pressure include mineral buildup, worn parts, and broken components. Start by inspecting easy-to-access fittings and valves. Look for signs of damage, leaks or corrosion. Don’t forget to examine supply hoses for kinks which block water flow. Narrowing down the exact issue will help you repair it properly.
Kitchen Sink Faucet Aerator Clogged
| Sympto | Possible Cause |
| Low water pressure or low flow | Mineral deposits or limescale clogging the aerator screens. |
| Reduced spray pattern | Food particles and sediment blocking water from passing through. |
| Noticeable gunk inside aerator | Dirt and debris accumulating where water passes through. |
| Rattling sounds from faucet | Material trapped vibrating inside the aerator screens. |
| Weak spray compared to before | Clogged aerator restricting water and reducing pressure flow. |
Signs It’s Time To Clean The Aerator
Slow water flow and weaker pressure are clear signs the aerator needs cleaning. Minerals filling the screens constrict water movement. You may also notice water spraying from the faucet in a uneven pattern. These problems worsen if mineral deposits are extensive.
Another symptom of an obstructed aerator is water pressure that feels reduced. With the screens clogged, less water can pass through each time you open the valves. Cleaning opens the aerator’s pathway to its full capacity.
How To Remove And Clean The Aerator
First, turn off the water supply piping to the sink by closing the shutoff valves under the sink. This prevents water from spraying while removing the aerator. Unscrew the aerator housing which is usually just finger tight.
Soak the small screens and housing in vinegar to dissolve mineral buildup. Let it sit for at least 30 minutes before scrubbing with an old toothbrush. Rinse thoroughly and replace, turning the water back on. The sink should now have restored pressure.
Benefits Of Cleaning The Aerator
Improved Water Flow: Cleaning the aerator ensures a steady and consistent water flow from your faucet, making tasks like dishwashing and handwashing more efficient.
Enhanced Water Pressure: Removing sediment and buildup from the aerator can help increase water pressure, allowing for quicker filling of pots and pans.
Water Conservation: A clean aerator can help reduce water wastage by ensuring that water flows smoothly without any blockages or obstructions.
Prolonged Lifespan of Fixtures: Regular cleaning prevents corrosion and damage to the aerator and faucet, extending their longevity and saving you money on repairs or replacements.
Healthier Water Quality: By eliminating dirt and debris, cleaning the aerator helps maintain cleaner and safer water for drinking and cooking, promoting better health and hygiene.
Tips For Preventing Future Clogs
Routinely inspect and clean the aerator every few months, depending on how often you use your kitchen sink. Hard water leaves deposits faster. Flush it by running vinegar or lime remover through when you notice a gradual drop in flow.
Consider using a water softener or filter if you have hard water. This proactively removes minerals before they stick in aerators or elsewhere. When washing dishes, avoid pouring food scraps down the drain to keep pipes clear longer between cleanings.
Washer And Fittings Worn Out

Over time, rubber washers and metal fittings wear out from constant use of the faucet. They slowly lose effectiveness controlling water pressure and flow. Symptoms include leaking when the handles are turned on and sluggish response.
Pay attention to how long the fittings have been installed. After five to ten years, normal wear takes a toll. Replacing them with new components restores a tight seal so water pours at full capacity again.
Parts That Control Water Flow
Three main parts work together inside the faucet body. Washers seated firmly against valves provide the waterproof seal. Fittings connect supply lines to the valve stems and outlet spout. All must be in good shape for water to move unimpeded.
Deteriorating washers no longer squeeze as tightly closed. Minute leaks add up, with pressure decreasing what reaches your hands. Fraying O-rings allow flow modulation to grow erratic as well. Identifying which parts need replacing renews their effectiveness.
Symptoms Of Worn Washers And Fittings
Beyond weakening output, worn components can lead to other issues. Water may drip from the faucet handles, whether on or off. The stream may sputter unpredictably when flow is adjusted. Repair is needed once control feels unreliable.
Fittings that have corroded internally cause friction as water tries traveling through. Impact on pressure builds over months unused. Check for green or brown discoloration indicating oxidation inside metal tube interiors.
Replacing The Washers
Switching out washers takes just a few minutes if you have the right replacement parts. Shut off water at the mains or under sink valves first though. Then use a wrench to remove the mounting nuts fixing the handles and spout.
Pry out old washers gently with a small tool. Inspect valve stems and thoroughly clean any residue before pressing new washers into place. Hand-tighten everything securely and turn water service back on. Test that fixtures now operate smoothly.
Benefits Of Replacing Old Fittings
- Improved Efficiency: Replacing old fittings with newer, more energy-efficient models can significantly improve the efficiency of your home’s systems. Modern fittings often incorporate advanced technology that reduces water or energy consumption, leading to lower utility bills over time.
- Enhanced Safety: Old fittings may pose safety risks due to wear and tear or outdated design. By replacing them with newer fittings, you can ensure that your home meets current safety standards, reducing the risk of accidents such as leaks, electrical faults, or gas hazards.
- Better Functionality: New fittings often come with improved features and functionality, providing better performance and convenience. Whether it’s a more responsive faucet, a quieter HVAC system, or a smarter lighting fixture, upgrading can enhance your daily living experience.
- Increased Property Value: Upgrading fittings can boost the overall value of your property. Potential buyers are often attracted to homes with modern, efficient systems in place, as it indicates lower maintenance costs and higher comfort levels, potentially leading to a quicker sale at a higher price.
- Environmental Impact: By replacing old fittings with eco-friendly alternatives, you can reduce your environmental footprint. Energy-efficient appliances, water-saving fixtures, and sustainable materials not only benefit the planet but also contribute to a greener lifestyle for you and your family.
Troubleshooting Your Kitchen Sink’s Water Pressure
5 short and easy paragraphs on troubleshooting your kitchen sink’s water pressure
- Check the aerator at the tip of the faucet. Over time sediment can build up and reduce flow. Remove and clean the aerator screen to restore pressure.
- Inspect connections under the sink for leaks. Tighten any loose fittings that are causing water loss. Leaks waste pressure before it reaches the faucet.
- Take a look at the supply valves. Old valves may get stuck partly closed. Opening them fully can increase pressure right away.
- Feel along pipe connections for cracks. Even small cracks will decrease pressure over time. Fix any leaks found with new fittings.
- Make sure the water supply lines are clear. Slow flow could mean a blockage. Turn off water and clean out debris from aerator and supply tubes.
Kitchen Sink Faucet Aerator Clogged
The small screens inside aerators often become clogged overtime. This restricts the flow of water and reduces pressure. Aerators also collect mineral deposits and grime. Regularly inspecting and cleaning aerators is an easy way to maintain good water flow.
A clogged aerator is usually the cause of low water pressure issues. They collect sediment and other debris that limits water passing through. This is an easy first step to take when troubleshooting low pressure problems in the kitchen.
Signs It’s Time To Clean The Aerator
Some signs it’s time for aerator cleaning include noticeably lower water flow and pressure. You may also see visible gunk built up inside the small screens. Water does not spray with as much force. There is a reduction in the water’s spray pattern from the faucet. These are all indications an aerator cleaning is overdue.
The aerator may also make rattling noises if debris has accumulated. Water pressure that used to be higher and is now weak usually means the aerator screens need cleaning to restore proper flow. Catching these issues early helps prevent more serious problems down the line.
How To Remove And Clean The Aerator
Removing most kitchen faucet aerators is quite simple. They usually unscrew clockwise from the end of the faucet spout. From there, you can rinse away debris from the small filter screens using water. For any mineral deposits, use your finger or an old toothbrush.
Be thorough cleaning in and around all screens and passages. Once cleaned, simply screw the aerator back on tightly. This should restore water flow and pressure provided no other issues exist. Regular cleaning is an easy maintenance task to keep faucets performing well.
Benefits Of Cleaning The Aerator
- Improved Water Flow: Cleaning the aerator ensures a smooth flow of water from the faucet. Over time, mineral deposits and debris can clog the aerator, causing reduced water pressure. Regular cleaning removes these obstructions, allowing water to flow freely.
- Enhanced Water Quality: A clean aerator helps maintain better water quality. Sediment and buildup within the aerator can harbor bacteria and impurities, affecting the taste and safety of the water. By cleaning the aerator, you ensure cleaner, fresher water for drinking, cooking, and other household tasks.
- Extended Lifespan of Fixtures: Regular maintenance of the aerator can prolong the lifespan of your faucet and other plumbing fixtures. Accumulated debris and mineral deposits can cause corrosion and damage to internal components over time. Cleaning the aerator prevents these issues, reducing the need for costly repairs or replacements.
- Energy and Cost Savings: A clean aerator promotes efficient water usage, which can lead to energy and cost savings over time. When water flows freely through the aerator, less energy is required to pump it, resulting in lower utility bills. Additionally, maintaining optimal water pressure reduces the temptation to increase flow, further conserving water and energy.
- Environmental Impact: By keeping the aerator clean and maintaining efficient water usage, you contribute to environmental conservation efforts. Conserving water helps preserve precious natural resources and reduces the strain on local ecosystems. Additionally, minimizing the need for repairs or replacements decreases the environmental footprint associated with manufacturing and disposing of plumbing fixtures.
Tips For Preventing Future Clogs
To help prevent aerators from getting clogged as quickly, run your kitchen faucet for a minute or two before using the water. This weekly flushing helps dislodge any particles trapped in the aerator screens.
Using filtered or softened water in your home also creates fewer mineral deposits that cause clogs. Food particles are more likely culprits for reduced flow. Always dry aerators with a towel after cleaning to further inhibit new buildup.
Washer And Fittings Worn Out

Over time, washers and other components inside the faucet valve can wear out from regular use. This includes rubber washers, -packing, and stem fittings that control water flow. Worn parts lead to gradual loss of pressure control.
Paying attention to any small leaks is important, as it may be a sign of worn internal fittings. Older faucets showing reduced water flow likely need some valve work or replacement.
Parts That Control Water Flow
Two main components control water flow through your faucet-the ceramic disc cartridge and an override shaft with rubber washers. As these parts age, washers compress or wear away. The cartridge may also crack with time. Together they regulate hot/cold water mixing and overall flow.
Deterioration causes inconsistent water pressure and temperature control. Water may leak from the faucet spout even in closed position. This signals the need for cartridge or washer replacement.
Symptoms Of Worn Washers And Fittings
Symptoms that washers or other valve parts are wearing out include uneven temperature control, changes in water pressure, and small leaks. Over time the faucet becomes harder to turn on and off. Water may drip occasionally from the spout when shut off.
Uneven flow from the hot/cold sides is also a warning sign internal components need attention. These issues worsen as parts continue wearing, making repairs worthwhile.
Replacing The Washers
Replacing worn washers and other fittings inside the faucet valve body is usually not difficult. Shut off the water supply first. Then unpack new washers, packing, or other components included in a repair kit.
Use a small wrench or pliers to access the valve. Carefully remove old parts, cleaning any debris. Press new ones firmly into place. Check for leaks after turning water supply back on. Properly installed replacement parts restore pressure control.
Benefits Of Replacing Old Fittings
Like cleaning the aerator, swapping old internal faucet parts helps restore full water pressure and control. New rubber washers and other components last much longer while precisely regulating flow. Replacing deteriorated valve parts is more affordable than a whole new faucet purchase as well.
Fixing worn washers and fittings before they cause leaks preserves your plumbing system. It also means better performance from the kitchen faucet for years to come. Addressing issues promptly helps avoid expensive repairs down the road.
Frequently Asked Question
How Do You Fix Low Water Pressure?
To fix low water pressure, check for clogged pipes or faucets and ensure the main valve is fully open. If issues persist, consult a plumber for further inspection.
How Do You Fix A High Water Pressure Sink?
To fix a high water pressure sink, adjust the pressure regulator valve or install a pressure-reducing valve to regulate water flow effectively.
Why Is My Water Pressure So Low In My Kitchen Sink?
Low water pressure in your kitchen sink could be due to clogged aerators or sediment buildup in the pipes, reducing flow. Additionally, issues with the water supply valve or a leak in the plumbing system may also contribute to low pressure.
Can I Fix My Own Water Pressure?
Yes, you can improve water pressure at home by checking for leaks in pipes or adjusting pressure regulators. However, complex issues may require professional assistance.
Conclusion
Increasing water pressure in your kitchen sink is achievable with a few simple steps. First, check for any clogs or obstructions in the faucet or pipes. Next, clean or replace the aerator to ensure smooth water flow. Additionally, adjusting the pressure regulator valve or installing a booster pump can significantly enhance water pressure.
By following these steps, you can effectively increase water pressure in your kitchen sink, improving the efficiency of tasks like dishwashing and food preparation. Remember to regularly maintain your plumbing system to prevent future pressure issues and enjoy a steady flow of water whenever you need it.