
Installing a sprayer on your kitchen sink can make cleaning dishes and filling pots much easier. A sprayer attachment connects right to your faucet and allows you to pull the hose out and spray water where you need it. The installation process involves removing the aerator from your faucet, connecting the diverter valve and hose, and making sure everything is sealed and secured.
Have you ever wanted an easier way to rinse your dishes or quickly fill a pot with water? Installing a sprayer on your kitchen sink allows you to do just that. With a simple question like How to install a sprayer on a kitchen sink?, you’ll be on your way to simplifying meal cleanup and preparation.
Adding a sprayer attachment to your kitchen faucet upgrades your sink’s functionality. The installation process requires only basic tools and takes less than an hour. Once connected, the sprayer hose and head allow you to extend your faucet’s reach and spray water right where you need it. The convenience it brings will have you wondering why you didn’t install one sooner.
Why Do You Need A Sprayer On Your Kitchen Sink?
A kitchen sink sprayer provides more control and flexibility for various cleaning tasks. The targeted jet stream is useful for rinsing dishes, washing produce, scrubbing the sink, and more. A sprayer allows you to direct water flow precisely where needed and adjust the pressure as desired. This level of control makes cleaning easier, especially for those with disabilities. Sprayers are also more water-efficient than a standard faucet.
Benefits Of Having A Sprayer On Your Kitchen Sink
5 benefits of having a sprayer on your kitchen sink:
- Increased flexibility – A sprayer allows you to more easily rinse dishes, wash produce, fill pots, and clean the sink basin.
- Improved cleaning – The pressurized spray makes cleaning stuck-on food and grease much easier compared to the main faucet.
- Water efficiency – A sprayer gives you greater control over water use compared to letting the faucet run.
- Faster filling – The high-pressure spray fills pots, pitchers and other vessels much faster.
- Enhanced accessibility – A pull-out sprayer on a hose makes cleaning the sink easier for those with mobility or dexterity issues.
The sources highlight benefits like increased flexibility and control over water flow, improved cleaning ability, water efficiency, faster filling of containers, and accessibility for those with disabilities. Key advantages include the ability to direct pressurized spray exactly where needed to clean dishes, sink, and produce more effectively.
Types Of Tasks Are Easier With A Kitchen Sink Sprayer
A variety of cleaning jobs become easier with a kitchen sink sprayer. Washing dishes by hand, including pots and pans, How To Install A Kitchen Sink Sprayer? is simpler when you can target tough spots of stuck-on food. Fresh produce like fruits and vegetables are quicker to rinse. Cleaning the sink itself is faster thanks to scrubbing ability.
Filling up cooking pots, water pitchers, vases, and more is convenient with the high water flow. Sprayers also help with other tasks like watering plants, washing kids’ hands, or rinsing off the dog’s paws after a muddy walk. Their flexibility suits many needs.
Sprayer Improve Your Kitchen Sink Functionality
A sprayer expands what you can do with your kitchen sink. It makes cleaning more efficient by allowing better aim and pressure control. You save water compared to a standard faucet.
Maneuverability around the whole sink basin gives you access to every area for thorough washing. The different spray settings adapt for various uses like gentle misting or powerful scrubbing. No longer limited to the faucet’s location, a sprayer brings the water to you. It becomes an indispensable tool for cleaning and other jobs.
Features Should You Look For In A Kitchen Sink Sprayer
When selecting a kitchen sink sprayer, key features to look for include adjustable water flow, easy maneuverability, retractable hose length, durable construction, and specialized spray settings. Consider the sprayer’s reach, flexibility, and ergonomics.
Water-saving options like touchless activation may appeal. Aesthetic touches like multiple finish options allow the sprayer to coordinate with your faucet and décor. Review available types like pull-down, pull-out, or side spray models. The right features suit your usage needs.
How Do You Choose The Right Kitchen Sink Sprayer?
When choosing a kitchen sink sprayer, first consider your personal style and layout to select a design that fits what you’re looking for. Also factor in convenience features like touchless or smart controls for cleanliness and ease of use. Determine what daily tasks you do to ensure the sprayer can accommodate your needs.
Sprayer Styles Work Best For Your Kitchen Sink
The main sprayer styles are pull-down, pull-out, and sidespray. Pull-down and pull-out sprayers can reach all areas of the sink while sidespray mounts on the side. All offer stream and spray water settings controlled by a touch feature to switch between the two. Pull-down and pull-out provide the most flexibility.
How Do You Match A Sprayer To Your Faucet?
Match your sprayer to the number of mounting holes your faucet has, typically between 1-5 holes. This ensures proper fit and spacing. Faucet accessories like sprayers require holes so make sure holes are available. The most common is 4 holes which provides room for various handles, spouts and sprayers.
What Sprayer Mounting Options Should You Consider For Your Kitchen Sink?
The main mounting options are deck mounted, non-deckplate, and wall mounted. Deck mounting is easiest to install and maintain since water lines are accessible. Non-deckplate sits on the countertop. Wall mounted sprayers attach to the wall or countertop near the stove to fill pots.
How Do Sprayer Finishes Impact Your Kitchen Sink Decor?
Sprayer finishes should match your faucet and complement your kitchen decor. Available finishes like chrome, bronze, nickel, and black stainless allow you to match appliances and hardware. Consistent finishes tie the whole kitchen together for a cohesive look.
What Do You Need To Install A Kitchen Sink Sprayer?
To install a new kitchen sink sprayer, you need the new sprayer assembly, which includes the sprayer head, hose, and mounting hardware. You also need basic tools like wrenches, channel locks, putty knife, basin wrench, flashlight, and plumber’s putty or silicone sealant.
Make sure to purchase the right sprayer that fits your existing faucet, either pull-out or pull-down style. Check that your faucet has a diverter valve to connect the sprayer hose. Turn off the water supply lines before starting.
Tools And Materials Are Required To Install A Kitchen Sink Sprayer
The tools you’ll need are basic plumbing tools – adjustable wrenches, basin wrench, putty knife, flashlight, channel lock pliers, Teflon tape, rag, bucket, and possibly a drill with hole saw bit.
Materials include the new sprayer assembly, plumber’s putty or silicone sealant, and replacement supply lines or braided stainless steel supply hoses if yours are worn. You’ll also need a few basic parts like washers and nuts that connect the sprayer. Make sure to purchase the correct style sprayer – pull-out or pull-down to match your faucet.
Prepare Your Kitchen Sink For Sprayer Installation
To prepare, clear all items out from under the sink so you have free access. Turn off hot and cold water supply valves, then turn on the faucet to relieve pressure and drain out water. Disconnect and drain the supply lines.
Remove existing sprayer assembly. Inspect sink area and faucet to make sure you have the correct new sprayer, diverter valve, and existing holes or mounting access. Clean sink surface thoroughly. Have all tools and materials ready to go before turning water back on for new sprayer install.
Steps To Disconnect Your Existing Kitchen Sink Faucet
| Steps to Disconnect Kitchen Faucet |
| Turn off water supply lines. |
| Open faucet to drain water. |
| Disconnect and unscrew supply lines. |
| Use basin wrench to loosen nuts. |
| Carefully lift faucet to remove. |
| Use putty knife to remove old caulk. |
| Disconnect sprayer and drain lines. |
| Prepare sink for new faucet. |
The key steps are turning off the water supply, draining any residual water from the faucet, disconnecting the supply lines and sprayer hoses, using a basin wrench to loosen the mounting nuts, gently lifting the faucet, and cleaning away any old caulk or putty from the sink. This disconnects the old faucet so the sink is ready for a new one to be installed.
Precautions Should You Take When Installing A New Kitchen Sink Sprayer
Take precautions to prevent leaks by applying plumber’s putty or silicone and using Teflon tape on all threaded connections. Follow manufacturer’s instructions for proper assembly and adjustments. Make sure to securely hand tighten connections first before finishing tightening with a wrench.
Check sprayer hose for kinks once connected. Turn water back on slowly to check for leaks. Make sure to test sprayer trigger operation and check underneath connections while water is running. Be prepared to quickly turn water off if a leak occurs. Wipe up any small leaks immediately to prevent water damage.
How Do You Install The Mounting Hardware For A Kitchen Sink Sprayer?

To install the mounting hardware, you first need to check if your faucet has a water diverter and appropriately sized mounting hole to accommodate the sprayer. If not, you’ll need to drill a new hole or replace the faucet. Insert the mounting bolt through the hole from above the sink and tighten the mounting bracket and flange from below using pliers or a wrench to secure it.
Position The Mounting Bracket On Your Kitchen Sink
The mounting bracket for the sprayer should be positioned beside the primary faucet, either to the right or left side. It should be placed close enough to allow the spray hose to reach the entire sink basin, but not so close that it interferes with using the main faucet.
Secure The Mounting Bolt For A Kitchen Sink Sprayer
To secure the mounting bolt, tighten the mounting nut from below the sink using pliers or a wrench, with the bolt threads facing down through the sink. Apply plumber’s putty around the gap between the bolt and sink to prevent leaks. Do not over tighten as this can lead to pressure build up.
Proper Way To Install Supply Lines For A Kitchen Sink Sprayer
The sprayer supply line connects from the diverter on the bottom of the faucet to the sprayer’s inlet using a braided stainless steel hose. This allows water flow to be diverted from the main faucet to the sprayer when engaged. Hand tighten the connections then give an additional quarter turn with pliers.
Check For Leaks After Installing A New Kitchen Sink Sprayer
After installation, turn the water supply back on and activate the sprayer to check for leaks at all connections. Also check below the sink for drips. If leaks occur, turn off the water and retighten the fittings. Wipe dry then test again while spraying in different directions.
How Do You Operate And Maintain Your New Kitchen Sink Sprayer?
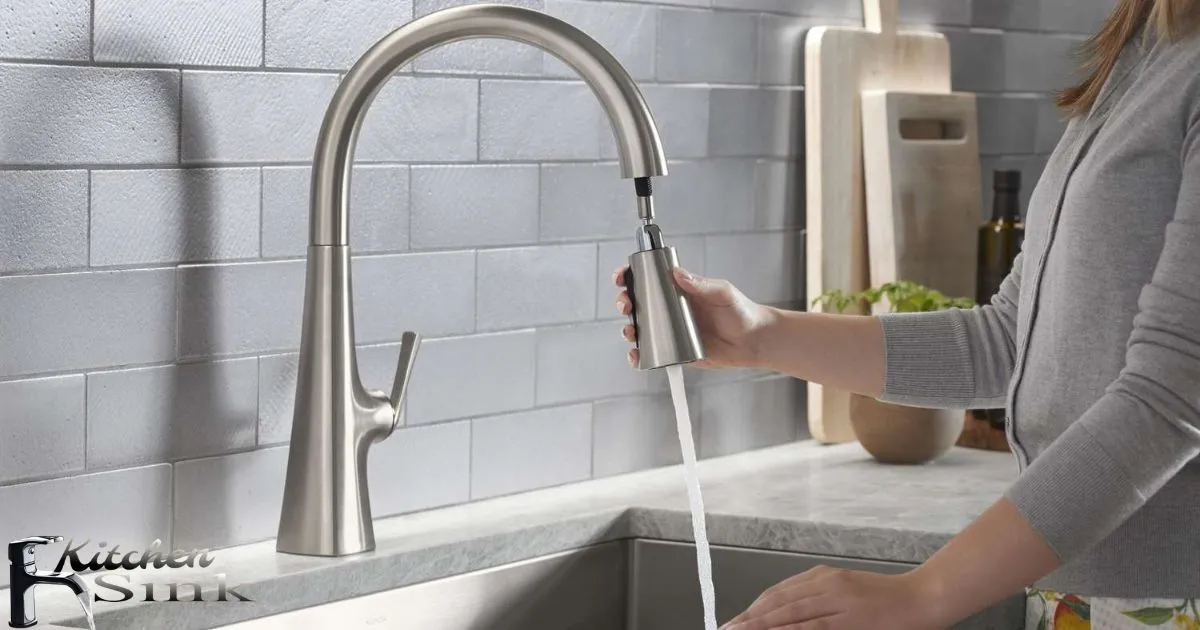
To operate a new kitchen sink sprayer, simply press the trigger on the sprayer head to release water. Make sure the water is turned on from the faucet handles first. To change between stream and spray modes, look for a button or switch on the sprayer head and toggle as needed.
Proper maintenance involves periodically cleaning the sprayer head nozzle to remove hard water buildup or debris. Use a toothpick or needle to gently clear any clogs. Also inspect the sprayer hose for kinks under the sink that could restrict water flow. Replace the hose if cracked or worn.
Controls On A Kitchen Sink Sprayer Work
Kitchen sink sprayers have controls right on the sprayer head to operate the unit. There is typically a trigger you pull with your fingers to release the water flow. Many sprayer heads also feature a button or switch to toggle between stream and spray modes.
The stream mode emits a concentrated jet of water for rinsing, while the spray mode disperses water over a wide area for cleaning. Higher-end sprayers may have multiple spray settings from gentle to intense. The controls are designed for easy, one-handed operation so you can freely scrub dishes or the sink with your other hand.
Best Way To Clean Your New Kitchen Sink Sprayer
To clean a kitchen sink sprayer, fill the sink halfway with warm water and add a small amount of white vinegar, then point the sprayer nozzle down into the water. Pull the trigger and let the solution run through the sprayer for 30-60 seconds. This helps remove any buildup inside.
Rinse by spraying clean water. For stuck-on debris, use an old toothbrush to gently scrub the nozzle. Avoid abrasive cleaners or soaking parts in harsh chemicals. Inspect the hose for kinks and make sure the weighted nut connecting the hose is tight. Let air dry completely before using again. Proper cleaning helps maintain optimal spray performance.
Inspect And Replace Sprayer Parts
It’s good practice to inspect your kitchen sink sprayer and hose every 3-6 months. Check for cracks, leaks, kinks, or worn parts. Test spray modes and water pressure to ensure proper functioning. If flow seems restricted, gently clean the nozzle with a toothpick. Over time, the weighted nut and o-rings connecting the hose can deteriorate.
Replace these parts every 2-3 years or if cracking or leaks occur. The sprayer head itself can last 5+ years if well-maintained. Overall lifespan depends on frequency of use and water quality. Replacing components periodically helps prevent bigger leaks or damage.
Troubleshooting Tips Help Keep A Kitchen Sink Sprayer Working
If a kitchen sink sprayer exhibits low pressure, first try cleaning nozzle debris with a toothpick. Inspect the hose under the sink for kinks that restrict flow. Tighten any loose connections with an adjustable wrench – especially the weighted nut attaching the hose. If spray mode won’t switch on, check for obstructions around the mode toggle button/switch.
Try soaking the head in a vinegar solution to dissolve mineral deposits. If leaks occur, ensure o-rings are seated properly or replace if worn. For constant dripping, replace old valve components. Getting familiar with sprayer parts aids troubleshooting. Overall, keeping things debris-free and connections tight prevents many common issues.
Frequently Asked Question
What tools do I need to install a kitchen sink sprayer?
Basic plumbing tools like wrenches, Teflon tape, and a screwdriver.
How do I remove the old faucet when installing a new kitchen sink sprayer?
Disconnect and remove supply lines, sprayer hose, and mounting nuts before lifting out the old faucet.
Where does the sprayer hose attach on a kitchen sink sprayer?
The sprayer hose attaches to the bottom outlet of the sprayer base.
What is the proper procedure for checking a kitchen sink sprayer for leaks?
Turn on the water supply and sprayer and inspect all connections for drips or leaks.
Why does my new kitchen sink sprayer have low water pressure?
Kinks in the sprayer hose, clogged aerator, or supply line issues can reduce sprayer water pressure.
Conclusion
Installing a sprayer on a kitchen sink requires getting the right faucet and sprayer hardware. First pick a faucet designed for adding a sprayer, with mounting holes and water diverter. Turn water off, remove old faucet and thoroughly clean sink area. Follow directions to install new faucet and screw sprayer in place. Connect sprayer hose to bottom outlet, ensuring a tight seal with plumber’s tape. Turn water back on and test sprayer for leaks. Fix any drips right away.
With the proper faucet and sprayer kit, installing a sprayer on your kitchen sink is a straightforward project. Work slowly and carefully, using plumber’s tape on all joints. Getting everything aligned and tightly sealed prevents leaks. Test thoroughly once installed. A sink sprayer is extremely useful for rinsing dishes and cleaning the sink. Taking time to install properly leads to years of hassle-free performance.