
Removing a Moen kitchen faucet from a sink is a straightforward process that involves disconnecting the water lines and unscrewing the faucet from the sink deck or countertop. To remove a Moen faucet, you’ll need basic tools like an adjustable wrench, Phillips screwdriver, flashlight, and a basin to catch any water that may spill. Always turn off the water supply lines before beginning.
How to Remove a Moen Kitchen Faucet From the Sink? While it may sound daunting, removing a Moen faucet is an easy plumbing task that most DIYers can tackle themselves in about 15-20 minutes. With the right tools and safety precautions, you’ll have that faucet detached from the sink before you know it.
The key things to know when removing a Moen kitchen faucet are to turn off the hot and cold water supply valves, disconnect the flexible supply tubes and sprayer hose using an adjustable wrench, unscrew any mounting nuts or screws that anchor the faucet, and finally lift the faucet assembly straight up to detach it from the sink. Always plug the sink drain to catch any water drips or spills during the process. Follow these basic steps properly, and the project will go quick and smooth.
Remove My Moen Kitchen Faucet From The Kitchen Sink
There are a few reasons why you may need to remove your Moen kitchen faucet. The most common reasons are to replace a faulty or worn out faucet, to upgrade to a new style or finish, or during a kitchen remodel when you need to remove the old faucet to install new countertops or a sink. Removing the faucet provides access that allows proper installation of the new sink or countertop.
Issues Might Require Faucet Removal From The Kitchen Sink
Common issues that might require removing the kitchen faucet include a leak in the faucet or supply lines, stuck handles that no longer turn on/off properly, a broken sprayer hose, low water flow indicating mineral buildup or clogs, and general wear and tear over time. Removing the faucet is the first step in diagnosing and resolving any of these problems.
Replace The Faucet On My Kitchen Sink
It’s a good idea to replace your kitchen faucet every 10-15 years. Signs that it may be time for a new faucet include frequent leaks, difficulty turning handles on and off, broken sprayer attachment, visible mineral deposits that reduce water flow, Fix Airlock In Kitchen Sink Drain and simply wanting to update the style or finish. Replacing older faucets before they fail helps prevent possible water damage.
Difficult To Remove A Moen Faucet From The Kitchen Sink
Removing a Moen kitchen faucet is generally straightforward with some basic DIY skills and tools. The main steps are shutting off water supply lines, disconnecting supply lines and sprayer hose, loosening the mounting nuts under the sink, and lifting the faucet out.
Watching a tutorial video can be very helpful before tackling this project. Patience and care is needed when handling supply lines and adjusting parts in the confined sink cabinet space.
Plumber To Remove My Kitchen Faucet
Most homeowners can remove a Moen kitchen faucet on their own following instructions. However, if you are uncomfortable working with supply lines and shut-off valves, unsure about compatibility with a new faucet, or encountering issues removing stubborn mounting nuts, it may be wise to hire an experienced plumber. They have the expertise to remove and install faucets properly with minimal frustration or complications.
Tools Do I Need To Remove A Moen Faucet From The Kitchen Sink

The basic tools needed are pliers, screwdrivers, wrenches, and optionally a basin wrench or Moen installation tool for leverage in tight spaces. You may also need Teflon tape, plumbers putty, or caulk for reinstalling the new faucet.
Basic Tools Will I Need To Remove The Kitchen Faucet
The basic tools are slip joint pliers or an adjustable wrench to loosen nuts, a Philips and flat head screwdriver for removing screws or prying off decorative caps, and open-end or adjustable wrenches for unscrewing supply lines and the faucet base.
Specialty Tools Might Be Helpful For Removing The Kitchen Sink Faucet
A basin wrench, which has a long handle and pivoting head to reach up inside the sink cabinet, can provide extra leverage when loosening nuts in tight spaces. Moen also makes a special plastic installation tool for their faucets.
Rent Tools To Remove The Faucet From My Kitchen Sink
Most basic tools like pliers and wrenches are available at hardware stores like Home Depot or Lowe’s for purchase. Specialty tools like basin wrenches can also be purchased or potentially rented from these stores. Some local tool rental shops may also carry basin wrenches for rent.
Avoid Damaging The Kitchen Sink When Removing The Faucet
Use towels or cardboard to protect the sink surface. Avoid letting tools scratch the sink. Clean up any plumbers putty residue carefully to avoid scratching. When reinstalling, put plumbers putty neatly around the faucet base and wipe away excess immediately to prevent sticking and residue.
Disconnect The Water Lines When Removing The Kitchen Faucet
To disconnect the water lines, locate the supply lines under the sink connected to the faucet. They will connect to shut-off valves – turn these valves off firmly to stop water flow. The connections to the faucet itself are often quick-connect push fittings – push the outer ring towards the pipe while pulling to release the grip teeth and slide the line off.
Turn Off The Water Before Removing The Kitchen Faucet
Always turn off the water before removing the faucet to prevent leaks. Locate the shut-off valves under the sink and turn them off firmly. If no shut-offs exist, turn off the main water supply to the house. Allow any remaining water to drain from the faucet.
Precautions Should I Take When Disconnecting The Water Lines
Take precautions like having a bucket ready to catch any drips when disconnecting lines. Wear eye protection in case fittings come loose under pressure. Be prepared to cut supply lines if the quick connect fittings won’t release. Have replacement supply lines ready to reconnect the new faucet.
Disconnect The Faucet’s Supply Lines From The Kitchen Sink
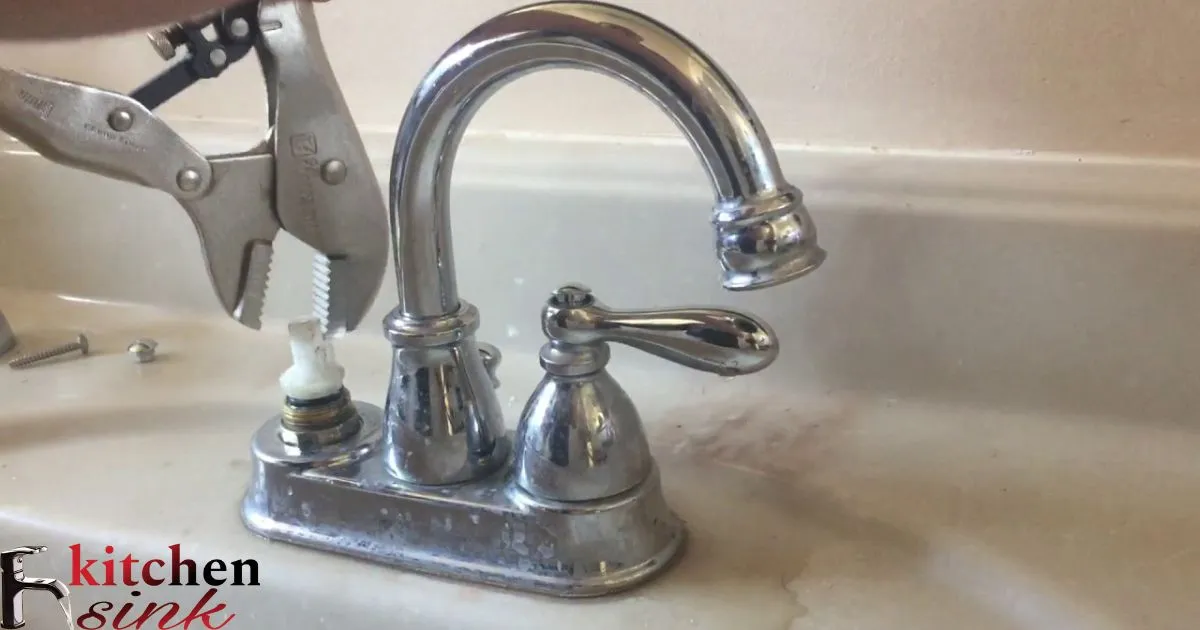
The faucet itself is held to the sink by a locking nut or screws underneath. Use a basin wrench to loosen this nut and detach the faucet. Removing the nut can be difficult if mineral deposits have built up, requiring penetrating oil and time to loosen the connection.
Faucet Installation Holes In My Kitchen Sink
Pay attention to the number and spacing of holes in your existing sink when selecting a new faucet, and whether it is single-handle or double-handle. Faucet hole covers or escutcheons may be needed to fill unused holes. If holes are incorrectly spaced, the countertop may need modification to accommodate the new faucet.
Best Process For Lifting Out The Kitchen Faucet
The best process is to first spray penetrating oil on the faucet nuts and fittings to loosen corrosion, then shut off the water supply valves. Next disconnect the sprayer hose, supply lines, and drain pipes before unscrewing the mounting nuts under the sink with a basin wrench.
With all connections detached, you can then carefully lift the faucet out vertically to avoid hitting the sink. Work slowly and have someone assist in lifting heavier faucets.
Apart The Moen Faucet For Removal From The Kitchen Sink
For a Moen faucet, first pry off the handle cap with a small flat screwdriver to access the screw holding the handle in place. Remove the screw and take off the handle. Then use an Allen wrench to detach the dome cap covering the cartridge and lift it out.
Finally, take out the cartridge by pulling straight up with pliers. This will allow you to fully disconnect the faucet from the water lines before lifting it out of the sink.
Proper Sequence Of Steps To Remove The Kitchen Faucet
The proper sequence is: 1) Turn off hot and cold water supply valves, 2) Disconnect and drain supply lines and sprayer hose, 3) Unscrew mounting nuts with basin wrench, 4) Detach remaining connections (e.g. pull-out sprayer diverter), 5) Carefully lift faucet straight up and out of sink. Doing these steps in this order allows you to fully detach the faucet safely before attempting to lift it out.
Kitchen Faucet Is Stuck And Won’t Lift Out Easily
If the faucet seems stuck, don’t force it as this can damage the sink. Instead, spray more penetrating oil around the base of the faucet and let it sit for 15-20 minutes. Then try gently rocking the faucet back and forth while lifting up to break the seal.
You can also try lightly tapping the faucet base with a rubber mallet. If it still won’t budge, there may be a remaining nut or connection that needs to be detached first before the faucet will come free.
Sink Area Once I’ve Removed The Kitchen Faucet
Once the faucet is out, clean the sink deck and any hard water stains or gunk with white vinegar and baking soda. Make a paste and apply it to stained areas, allowing it to sit for 5 minutes before scrubbing and rinsing. For extra grimy spots, cover with vinegar-soaked paper towels overnight before scrubbing clean.
Wipe down the entire sink with an all-purpose cleaner and rinse thoroughly. Finally, seal the sink deck with caulk or silicone sealant before installing the new faucet.
Install A New Kitchen Faucet After Removing The Old One
After removing the old faucet, first clean the sink surface thoroughly to remove any debris or old caulk. Make sure the water supply lines are tightened and reconnected properly.
Slide the faucet base gasket over the water supply tubes and into place under the new faucet. Use a plumber’s putty or caulk to seal the faucet base to the sink. Secure the faucet by tightening the mounting nuts under the sink. Reconnect the supply tubes to the faucet tailpieces.
Type Of New Faucet Is Best For My Kitchen Sink
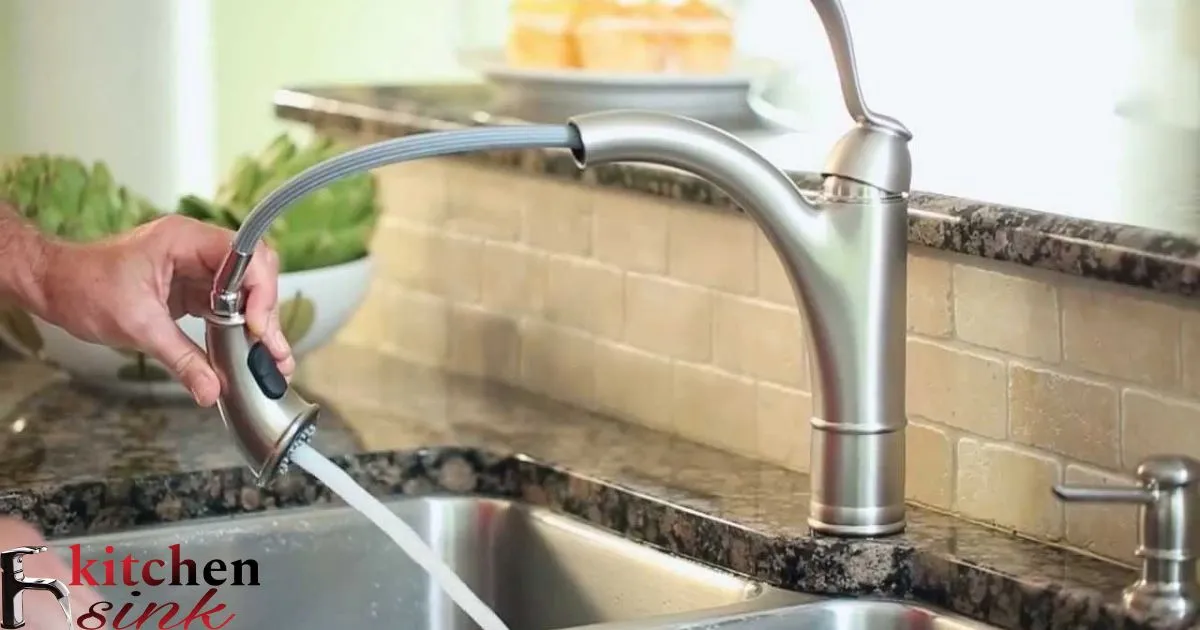
Consider the height, reach, and flow rate you need when selecting a new kitchen faucet. Pull-down and pull-out faucet styles add versatility. Hands-free options are convenient when cooking. Bridge faucets work well with double bowl sinks.
Choose a durable faucet made of metal rather than plastic. Match the faucet finish to existing hardware. An anti-scald, single-handle faucet offers temperature control.
What Do I Need To Know About Installing The New Kitchen Faucet?
The key things to know are to fully shut off the water supply, disconnect existing plumbing connections properly, and make new water-tight plumbing connections. Clear space to work under the sink.
Have the necessary tools – basin wrench, adjustable wrench, plumber’s putty/caulk, bucket, rags, flashlight. Follow manufacturer’s directions for installation. Be prepared for complications like stuck faucet nuts or corroded supply tubes.
Mistakes Should I Avoid When Installing A New Kitchen Sink Faucet
Don’t attempt installation without turning off water supply. Don’t strip threads or overtighten connections. Don’t allow leaks – seal properly with putty and gaskets. Don’t install parts loosely or unevenly. Don’t connect hot and cold supply lines backward. Don’t use plumber’s tape that can come loose and clog aerators. Don’t install without testing for leaks thoroughly first.
Test For Leaks After Installing A New Faucet In My Kitchen Sink
After installing the new faucet, turn the water back on and visually inspect all connections for drips and leaks under the sink. Tighten any loose connections. Turn on both hot and cold water to full pressure and visually confirm proper water flow and drainage with no leaks at faucet base. Feel around base of sink to confirm no water accumulation underneath. Let faucet run for several minutes and double check for leaks throughout.
Frequently Asked Question
How Do I Detach The Sprayer Hose?
Disconnect it from the diverter by pressing on the tabs and pulling down.
What Tool Do I Need To Take Off The Dome Cap?
Use an Allen wrench to detach the dome cap covering the cartridge.
How Do I Remove The Moen Faucet Handle?
Pry off the handle cap with a flat screwdriver, take out the handle screw, and pull the handle straight off.
What Is Used To Unscrew The Mounting Nuts Under The Sink?
Use a basin wrench to loosen and unscrew the mounting nuts.
How Do I Avoid Banging Up The Sink When Removing The Faucet?
Carefully lift the detached faucet straight up and out of the sink hole vertically to prevent hitting the sink.
Conclusion
Removing a Moen kitchen faucet is not too hard. First, turn off water supply lines under the sink. Use a basin wrench to loosen the mounting nuts and detach the water lines. Lift the faucet out. Clean the sink surface well.
To install the new faucet, first slide on gasket. Apply plumber’s putty to seal base. Tighten mounting nuts below. Reattach supply lines. Turn water back on to test for leaks. Check all fittings. Let the faucet run for a few minutes. Make sure there are no leaks. Tighten anything loose. Then the install is complete.