
Mold growth in kitchen sink caulk is a common problem caused by moisture. Over time, the caulk can become discolored and damaged from mold taking hold in the crevices. Removing the mold is important to prevent it from spreading and to keep the kitchen clean and hygienic. The process involves scraping out the old caulk completely using a utility knife or caulk removal tool before applying new, mold-resistant caulk.
How to Remove Mold From Kitchen Sink Caulk? This is a question that many homeowners find themselves asking after noticing dark mold stains around their sink. While mold in caulk poses no serious health risks, it looks unpleasant and could spread if left unchecked. Thankfully, the process of eliminating mold from caulk gaps is straightforward and affordable.
Getting rid of mold on kitchen sink caulk requires gently scraping out the old caulk to remove all traces of mold. Bleach or vinegar can also be used to kill mold spores before reapplying fresh caulk. The key is using mold-resistant caulk containing fungicides to prevent future mold growth. Taking these simple steps can rid sink surrounds of mold and leave your kitchen looking tidy once more.
Mold In My Kitchen Sink Caulk
Mold grows in kitchen sink caulk because it is continuously exposed to moisture. Kitchen sinks see a lot of water use, and water can seep into or remain trapped within the caulk, allowing mold spores already present in the air to take hold and multiply. Cracks or gaps in the caulk also provide entry points for water.
Causes Mold To Grow In Kitchen Sink Caulk?
The main causes of mold growth in kitchen sink caulk are moisture, lack of ventilation, and organic matter. Moisture allows mold spores to germinate. Poor ventilation prevents the caulk from fully drying out between uses. And tiny bits of food, soap scum, etc get trapped in the caulk, Rid Of Mice Under Kitchen Sink providing nutrients for mold. Temperature also plays a role – warm, humid conditions accelerate mold growth.
Signs Of Mold Growth In Kitchen Sink Caulk
The most obvious signs of mold in kitchen sink caulk are visible mold growth – usually black, green, or orange fuzz or spots around the caulk. The caulk may also be cracked, soft, crumbly, or stained. Other signs are a musty odor coming from the caulk, and moisture accumulation or dripping from the caulk even when the sink isn’t in use.
Mold In My Kitchen Sink Caulk Dangerous
Yes, mold growth in kitchen sink caulk can potentially be dangerous. Certain types of mold release toxins that can cause respiratory issues or allergic reactions if inhaled or exposed over time. Mold also damages surfaces it grows on and can spread to other areas. Extensive mold is unsafe and the caulk should be promptly removed and replaced.
Prevent Mold From Growing In Kitchen Sink Caulk
To prevent mold in kitchen sink caulk, use a mold-resistant silicone caulk designed for kitchen/bathroom use. Routinely check the caulk for any cracks or damage. Keep the area dry and well-ventilated. Clean the sink and caulk regularly with bleach or vinegar solution. Make sure there are no leaks or moisture issues under the sink. Re-caulk when needed to avoid gaps.
Remove Mold From Kitchen Sink Caulk
To remove mold from kitchen sink caulk, you’ll need a caulk removal tool, new caulk and caulk gun, mold killing solutions like bleach or hydrogen peroxide, and scrub brushes. Carefully cut out the moldy caulk then scrub the area to remove mold and mildew. Ensure you kill off mold spores to prevent regrowth.
tools do I need to remove mold from kitchen sink caulk
The tools you’ll need include a caulk removal tool or utility knife to scrape out the old caulk, a caulk gun and new caulk to replace it, stiff nylon scrub brushes in various sizes, and mold killing cleaners like bleach, hydrogen peroxide, or other commercial mold removers.
cleaning solutions work best to remove mold from kitchen sink caulk
Bleach, hydrogen peroxide, borax powder solution, and commercial mold killing cleaners work best to remove mold from caulk. Apply them to the scrubbed area after removing the old caulk to kill mold spores and prevent regrowth. Bleach is effective but test first for colorfastness.
step-by-step process to remove mold from kitchen sink caulk
step-by-step process for removing mold from kitchen sink caulk in easy, short sentences formatted as a table:
| Step | Action |
| 1 | Remove old caulk with a caulk removal tool or knife |
| 2 | Clean gap and sink surfaces with soap and water |
| 3 | Scrub away mold and mildew with bleach cleaner |
| 4 | Allow area to dry completely |
| 5 | Apply new silicone caulk designed for kitchens |
| 6 | Smooth new caulk with finger or tool |
| 7 | Let new caulk cure fully before exposing to water |
precautions should I take when removing mold from kitchen sink caulk
Wear gloves, goggles, an N95 mask, and work in a well-ventilated area. Check cleaner compatibility with your surfaces first. Rinse any chemical residues thoroughly. Work carefully with utility knives. Let chemicals sit an appropriate dwell time before rinsing. Never mix cleaners like bleach and ammonia.
Recaulk My Kitchen Sink After Removing Mold

First, thoroughly clean the area using a mold killing product. Scrub away any visible mold then disinfect the area. Ensure it is completely dry before applying new caulk. Wear gloves and a mask when cleaning mold to avoid contact.
clean the kitchen sink before recaulking
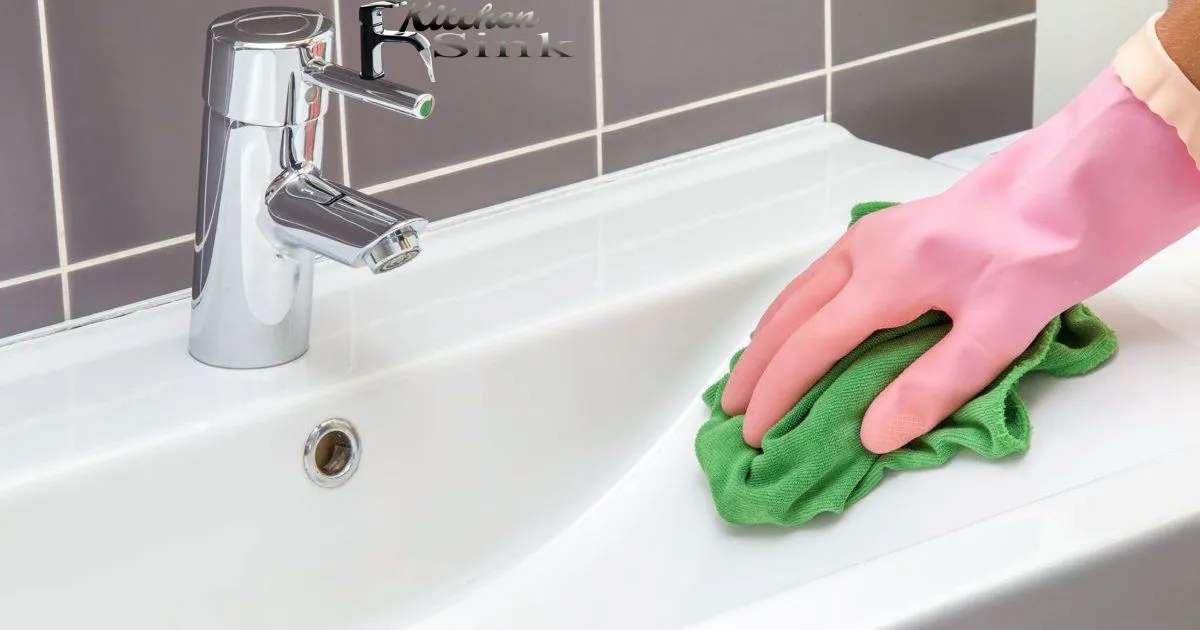
To prepare the area, use a utility knife to completely remove all old caulk. Then clean the gap between the sink and counter with soap and water. Use abrasives like steel wool to remove any grime or soap scum buildup. Wipe the area completely dry with a clean cloth before recaulking.
type of caulk should I use to recaulk my kitchen sink
Use a mold-resistant silicone caulk designed for kitchen and bath applications. Make sure it offers long-lasting flexibility, adhesion and waterproofing. Silicone caulks resist mold growth better than latex-based caulks.
Proper Technique For Recaulking A Kitchen Sink
Load the caulk gun, cut the nozzle at a 45 degree angle, and neatly apply the caulk in a continuous bead without gaps. Use a plastic spreader or your finger to smooth it evenly. Remove excess caulk with a damp paper towel. Let it dry completely based on manufacturer’s cure time before exposing to water.
Kitchen Sink Caulk Need To Cure
Most silicone caulks take 24-48 hours to fully cure. Avoid getting the new caulk wet during this time. After 48 hours, it should be completely waterproof and ready for normal use. Check the product instructions as some caulks require up to 7 days to fully cure and seal.
keep mold from coming back in my kitchen sink caulk
To prevent mold from recurring in kitchen sink caulk, it is important to fully kill existing mold spores and eliminate moisture that allows new mold to grow. This involves removing all old caulk, cleaning the area thoroughly with bleach or vinegar, allowing it to dry completely, and re-caulking with a high-quality silicone kitchen & bath caulk specifically designed to resist mold. It’s also critical to regularly clean the area with bleach to kill any remaining spores.
promote kitchen sink caulk drying
Proper drying of new kitchen sink caulk can help prevent future mold growth. Allow adequate drying time before exposing new caulk to water. Speed drying by ensuring the area is clean prior to caulking, maintaining good ventilation, using a hair dryer on a cool setting if needed, and using caulks designed for kitchens and bathrooms that cure faster than standard caulks.
bathroom kitchen sink caulk with mold inhibitors
Yes, when re-caulking a kitchen sink where mold has been an issue, it is advisable to use a caulk made specifically for kitchen and bath applications that contains mold inhibitors. The mold fighting additives will help prevent future mold growth. 100% silicone caulks provide maximum waterproofing compared to latex caulks.
What household cleaners prevent mold from growing in kitchen sink caulk?
Regular cleaning of kitchen sink caulk with household bleach or hydrogen peroxide will help prevent mold growth by killing mold spores. White vinegar is also effective at preventing mold. Be sure to thoroughly rinse off cleaners after application.
check kitchen sink caulk for mold
It’s a good practice to check kitchen sink caulk every 1-2 months for any signs of mold growth. Catching mold early provides the best chance for quick and effective treatment. Pay particular attention to areas near the faucet and along the backsplash wall where moisture exposure is highest.
Professional For Kitchen Sink Caulk Mold Removal
You should call a professional mold remediation company if the mold growth in the caulk is extensive, covers a large area, or keeps recurring after attempts to remove it yourself. Professionals have specialized equipment and solutions to thoroughly kill mold and prevent it from returning.
signs I cannot remove the mold in my kitchen sink caulk myself
Signs you need professional help include if the mold persists after cleaning attempts, is inside porous materials like wood or drywall, covers over 10 square feet, or you have health issues like allergies or asthma that make DIY mold removal unsafe.
Professional To Remove Mold From My Kitchen Sink Caulk
5 easy short steps to professionally remove mold from kitchen sink caulk:
- Cut out old caulk with a utility knife
- Clean gap and surfaces with soapy water
- Apply bleach cleaner and scrub with brush
- Rinse cleaned area and let fully dry
- Recaulk with new silicone caulk
Process For A Professional To Remove Mold From Kitchen Sink Caulk
The process involves containment to prevent spore spread, killing mold with commercial biocides, removing affected caulk and porous materials, drying out the area, and re-caulking with mold-resistant silicone. The average cost ranges from $500-$4000 depending on the size of the job.
Frequently Asked Question
What is the best way to remove old caulk?
Slice through the caulk with a utility knife then pry it out with a flathead screwdriver.
What household cleaner kills mold in caulk?
Use a 50/50 bleach and water solution to kill mold spores and clean the area.
Should I use silicone or latex caulk around a kitchen sink?
100% silicone caulk provides maximum waterproofing to prevent moisture leading to mold.
How long should I let new caulk dry before using the sink?
Allow 24 hours for caulk to fully cure before exposing it to water to prevent mold growth.
What can I add to caulk to prevent future mold?
Look for caulks labeled as “mold resistant” that contain antimicrobial additives to inhibit mold.
Conclusion
Removing mold from kitchen sink caulk can seem daunting, but is doable with some simple steps. First, gather your supplies – a mold killing cleaner like bleach or hydrogen peroxide, a scrub brush, caulk removing tool, and new silicone caulk. Then, cut out all the old caulk and scrub the area to remove mold and mildew. Let it dry completely before applying new silicone caulk, smoothing it into place.
By using the right materials and following these key steps of cutting out the old caulk, cleaning the area thoroughly, letting it dry completely, and re-caulking with mold-resistant silicone, you can successfully remove mold from your kitchen sink caulk. Taking time to do this prevents continued mold growth and health hazards. Maintaining the caulk properly from then on keeps the area looking neat and clean.